Posted on Leave a comment

Herb Guide: Pruning and Harvesting

I have been gardening for the last 3+ years and learn something new every year. During this time, I have learned that pruning (or trimming) your plants is essential to a healthy plant and a good harvest, which is ultimately the goal! Pruning helps keep your plants healthy and allows you to control their growth. However, pruning and harvesting is often different based on the plant so it’s important to know the methods you need to use for each plant.

I find that herbs in particular, need constant pruning to control or promote growth. I decided to create this user-friendly guide to pruning and harvesting as a resource to my followers and out of my necessity as a gardener.

A few key points to remember:

  • When harvesting most herbs and plants, be sure to only harvest 1/3 of the plant at a time and allow time for it to recover. This will encourage continued growth without devastating the plant.
  • Harvest from the top. I know it seems opposite of what you think but trust me, harvesting from the top instead of the bottom helps keep your plant sturdy, but promotes continued growth.
  • Know which tool to use for pruning and harvesting…your fingers or kitchen/garden shears. Some herbs are more delicate than others so it’s important to know the difference.

Annual vs. Perennial: Annual plants grow and live for one growing season. They need to be replanted every spring season. Perennials grow and regrow every spring season. Perennials are less work than annuals because they do not require re-seeding each season.

DILL

Method: Kitchen Shears

Category: Biennial (a mix between an annual and perennial, meaning a single dill plant has the potential to live up to 2 year, but can be very sensitive to frost and freezing).

Pruning:

  • Snip off the flowers at the tops of the stems. Be diligent with pruning the flowers of the dill plant unless you are ready for the dill to go to seed. Once the dill sets to seed, the plant stops producing and starts to dry out (which is fine if it is the end of the season).IMG_6885

Harvesting:

  • Harvest from the top of the dill plant
  • Harvest at the elbow of stems or where leaves meet the main stem (see picture below).
  • If you desire to cut an entire main stem or stock, do so at least 3-4 inches about the ground to promote re-growth.

Recommended uses: Tzatziki, pickling cucumbers and other vegetables, roasted carrots, salmon and lemon, potato or egg salad, fresh pasta-based or green salad paired with feta cheese

IMG_6894

BASIL

Method: Fingers

Category: Annual

Pruning:

  • Wait until the plant is 6 inches tall before pruning
  • Pinch flower buds off to force the plant to focus its’ energy on the actual basil leaves
  • If growing vertically, pinch off leaves from the top (this will encourage lateral growth)

Harvesting:

  • Pinch above where there are 2 large leaves on either side with small leaves with them
  • Pinch 1/4 inch above a node and 3 inches from the base of the plant
  • Don’t be afraid to be a little more aggressive with your basil harvesting. Basil is a rapid-growing herb and can recover well from more aggressive harvests.

Recommended uses: Italian dishes, ramen, pesto, raw green salads, pasta

IMG_6884

ROSEMARY

Method: Garden or kitchen shears

Category: Perennial

Pruning:

  • Prune anytime during spring and summer until 4-6 weeks before the 1st frost
  • Wait to prune rosemary until the plant is 4 inches tall

Harvesting:

  • Trim stems ~4 inches at the end of each stem (see featured image at the top of the page)
  • Avoid the woody parts of the stem

Recommended uses: Roasted vegetables, Gin-based cocktails, herb-flavored olive oil or butter, herbed spreads using mayo or Greek yogurt, added to crackers or pita chips

img_7634

IMG_6889

MINT

Method: Fingers

*Planting: If possible, mint should be planted in a separate container due to the runners that grow under the ground and have a tendency to invade other herbs.

Category: perennial

Pruning:

  • Wait until 6 inches tall then cut stems 1 inch from the soil to promote better growth.

Harvesting:

  • Harvest around the plant to control the growth.
  • Cut stems 1 inch from the soil
  • Be aggressive, be, be aggressive! Mint is a rapid-growing herb so don’t be afraid to be more aggressive with your pruning and harvesting.

Recommended uses: Mojito, fruit salads, pestos, tabbouleh, mint julep or non-alcoholic spritzer with fresh fruit, homemade mint chocolate chip ice cream

IMG_6892

IMG_6890

Please feel free to add comments or suggestions! I am open to all feedback because like I said before, gardening is a constant learning process for me. Stay tuned for my next herb guide on how to best preserve your herbs.


-EAW


Resources:

http://www.homegrown.org/forum/topics/harvesting-herbs-101-basil-chives-cilantro-coriander-mint-parsley

http://homeguides.sfgate.com/prune-dill-71334.html

Posted on Leave a comment

Homemade Popsicles


I have been wanting to make homemade popsicles for quite some time now. I finally bit the bullet and ordered the molds from Amazon. Being that this was my first time making them, this recipe is pretty easy and can be tailored to your flavor preference. These popsicles are a great healthy dessert option and will definitely cool you off in these hot summer months. They are also incredibly kid-friendly and would be a great way to get your kids in the kitchen.

Popsicle Base

Yield: 6-8 popsicles

Prep time: 15-20 minutes (depending on your additional flavorings), Freeze time: 2-3 hours

Ingredients:

  • 1 cup plain Greek yogurt
  • 1 Tbsp sunflower honey
  • 1 tsp vanilla extract
  • 1/4 cup coconut milk

Directions:

Combine the yogurt, honey, vanilla, coconut milk, and your desired popsicle flavorings in the blender or Ninja and blend until smooth. Add your flavor variations as desired. Save some of the fresh fruit for each recipe and add to the popsicle molds once the liquid has been added. Fill each mold about 3/4 full and add fresh fruit as desired. See below for my variations.

Raspberry Mint

  • 1 Tbsp fresh chopped mint leaves
  • 1/4 cup fresh raspberries (use half for blending and half for color in the molds) FullSizeRender_2

Orange Dreamsicle

  • 2 Tbsp 100% orange juice or juice from 1/2 an orange
  • Orange zest from 1/2 an orange (~1 Tbsp)
  • 1/4 cup fresh orange, chopped into chunks (use half for blending and half for color in the molds) FullSizeRender_1

Chocolate Chip

  • 1/4 cup semi-sweet chocolate chips, chopped

Kiwi Lime

  • 2 Tbsp fresh lime juice (juice from ~half a lime)
  • 1 Tbsp lime zest (zest from half a lime)
  • 1/4 cup fresh kiwi, peeled and sliced (use half for blending and half for color in the molds) FullSizeRender_3

Strawberry Banana

  • 3/4 banana
  • 1/4 cup fresh strawberries, sliced (use half for blending and half for color in the molds)

Once you have your molds filled with your desired flavoring, place in the freezer. After 10 minutes, insert popsicle sticks into each mold. Freeze for at least 2-3 hours.

To remove the popsicles from the molds, fill your kitchen sink with lukewarm (not hot!) water high enough to reach at least 3/4 the way up the side of the popsicle mold. Place the mold in the water for 30 seconds and then place on a kitchen towel on the counter. Remove the metal top from the mold. Wiggle the popsicle stick slightly and firmly pull up. If they are a little stubborn to come out, then place the mold back in the water for another 10 seconds (no longer!) and try again. Use 10-second intervals if the popsicles are still difficult to remove. Do not place in for longer, otherwise the tip of the popsicle will start to melt.

Once the popsicles are removed, serve immediately or place in a plastic ziplock gallon freezer bag and store in the freezer.

FullSizeRender_4


Enjoy!

-EAW


Posted on Leave a comment

Coconut Oil: A slippery slope?


A recent report came out from the American Heart Association’s (AHA) presidential advisory board warning against the use of coconut oil and truthfully all I thought to myself was….FINALLY. Don't get me wrong, fats do belong in a healthy diet, but you are wrong to think too much saturated fat is going to keep your heart healthy.

Cardiovascular disease (CVD) is the leading cause of death worldwide, accounting for 1 of every 3 deaths. In regards to reducing risk of CVD, the AHA’s recommendations since 1961 has consistently advised to reduce dietary saturated fat intake. AHA’s recent report took a deep dive into the latest scientific evidence on dietary fats and CVD risk. The conclusion of this report is again consistent with their previous recommendations: keep saturated fat intake to <10% of your total calories and replace saturated fats with mono- and polyunsaturated fats more often. If you have elevated LDL cholesterol levels, recommendations are even stricter and include reducing saturated fat intake to <5-6% of total calorie intake.

With coconut oil containing ~82% saturated fat (even beating butter and lard for saturated fat content), the AHA’s response to using this oil is simple…don’t. A review of 7 controlled clinical trials revealed that coconut oil raised LDL, the bad cholesterol, in comparison with monounsaturated and polyunsaturated oils in all 7 trials. But have no fear. I am here to help! I have an easy guide for how to incorporate oils in a healthy diet.

Check out my news segment with WZZM here for the audio guide.

Key takeaway (if you read nothing else, read this!): Choose monounsaturated and polyunsaturated fats over saturated fats as much as possible. They have been shown to help reduce LDL cholesterol (yay!).

  • Monounsaturated fats: olive oil, safflower oil, sesame oil, avocados, peanut butter, almondsFullSizeRender
  • Polyunsaturated fats: peanut oil, canola oil, soybean oil, corn oil, sunflower oil, walnutsFullSizeRender_1
  • Saturated fats: butter, coconut oil, ghee, palm oil, lard, beef fat, whole fat dairy, lamb, pork, poultry with skinFullSizeRender_2

Serving size: 

  • Oils: 1 TbspFullSizeRender_4
  • Foods rich in oils:
    • Trans fat-free margarine and mayonnaise: 1 Tbsp
    • Salad dressings and peanut butter: 2 Tbsp
    • Avocado: ½ medium or 3 tsp
    • Nuts (peanuts, cashews, almonds, hazelnuts): 1 oz or 3 tsp
  • Average calories per serving: 75-150 calories
  • Daily Oil Allowance: ~2 Tbsp for adultsFullSizeRender_3

Smoke point: the degree to which an oil or fat starts smoking and breaking down. If your oil is heated past it's smoke point, the fat in the oil starts to break down and releases free radicals. These free radicals create unpalatable flavors and promote inflammation in the body. Be sure to use oils based on your cooking methods.

  • Searing, deep-frying, stir-frying: peanut, corn, or safflower oil
  • Salad dressings or sautéing: virgin olive, avocado, or sesame oil

Storage: Oils should be stored in a dry, dark, and cool place away from light, heat, moisture, and air. I know those clear, glass bottles with the special nozzles are tempting to keep as a kitchen counter accessory, but your oils should really be kept away from heat in a dark, dry place so avoid storing it in the cupboard above the stove.

Purchasing: When grabbing your favorite oil from the local grocery store, try to avoid buying in bulk and stick with the smaller containers of oils. The bigger the container, the more likely the oil will have time to go rancid before you finish it. Try to stick with virgin or raw oils to preserve the best flavor. Lastly, there is always the unknown of how long the oil has already been sitting on the shelf absorbing the unwanted fluorescent light at the grocery store. Try to avoid picking the first or second oil on the shelf. Do a little shuffling and pick one farther back in the line protected by darkness of the shelf. This helps to avoid purchasing potentially half-rancid oil without even knowing it.


P.S. Still got a jar of coconut oil sitting around and don't what to do with it now that you've learned it's not the healthiest of fats? It'll make an excellent moisturizer or hair conditioner. So instead of contributing to your bum fat, it will make your bum soft 😉

-EAW


Resources:

www.heart.org

www.choosemyplate.gov

www.circ.ahajournals.org

http://www.seriouseats.com/2014/05/cooking-fats-101-whats-a-smoke-point-and-why-does-it-matter.html

Posted on Leave a comment

Healthy Salad Toolkit

Building a healthy salad is easy enough right?

But I’m pretty sure we can all agree that we’ve seen a fair share of people that get to the end of the salad bar line (with all the best intentions) and end up dumping half a cup of Ranch dressing all over their salad. We have all seen it or been culprits of it. Building a healthy salad can be a daunting task especially if we are faced with so many healthy and unhealthy options from a salad bar…bacon, hard-boiled eggs, ham, specialty cheeses, avocado, every dressing under the sun, and croutons to name a few. If we aren’t careful, entree salads can reach up to 1000 calories or more…ultimately debunking our recommended daily caloric intake.

Just like most things in life, the key to a healthy salad is balance and knowing which foods may ultimately tip the scale a little too far if you aren’t aware of portion sizes. Salads can be comprised of many different food groups (and should!) such as vegetables, lean protein, complex carbohydrates, fruits, low-fat dairy, healthy fats, and light dressing. So let’s jump right into this step-by-step toolkit.

Salad Toolkit-Food Demo-Cancer Survivors Day 2017
My healthy salad toolkit and food demo table at Cancer Survivor’s Day 2017

Building your Base:

IMG_6818
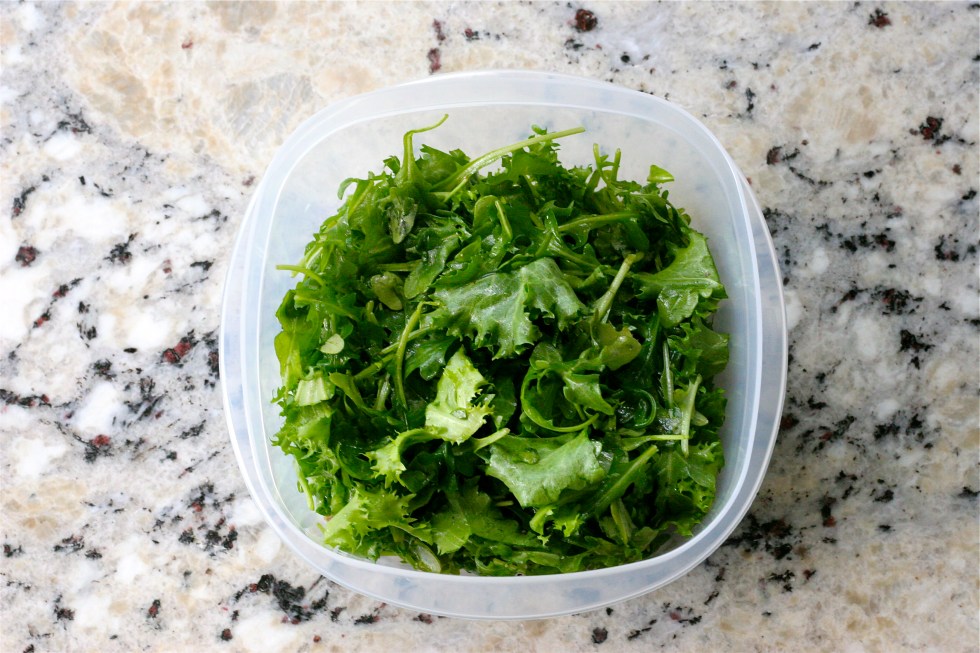
Massaged arugula and endive lettuce greens.

Choosing the best type of greens is essential to building a great salad. Avoid iceberg lettuce and get adventurous with the many options of nutrient-dense greens available.

  • Options: arugula, Asian greens (mizuna, pac choi, tatsoi, etc.), romaine, bibb, mesclun, sorrel, endive, kale, spinach, or a spring mix.

For 20 calories per 2 cups, feel free to load up your bowl!

Great sources of fiber, folate, carotenoids, iron, calcium, and vitamins C and K.

Feel free to mix in fresh herbs to add an interesting dynamic of flavor (parsley, basil, cilantro, dill).

Quick tip:

Try massaging kale and arugula with 1-2 Tbsp of extra-virgin olive oil to make the leaves more palatable in a raw salad.

Load Up on Veggies:

IMG_6820

The world provides endless variety when it comes to what vegetables to add to your salad. Try to stick with non-starchy vegetables to help keep your salad low-calorie and use what’s in season.

  • Broccoli, cucumbers, cauliflower, carrots, squash, asparagus, bell peppers, red onion, etc.
  • Avoid pre-marinated or fried vegetables to reduce unwanted calories from fat.
  • For 25 calories per ½ cup serving, you can beef up your salad with loads of vitamins, minerals, anti-oxidants, and dietary fiber.
  • Aim for at least 2 different vegetables on your salad to get in those anti-cancer effects!

Quick tip:

Aim to get in at least 3-5 servings of fruits and vegetables daily.

Picking your Protein:

IMG_6823

Picking the right protein can be a little daunting. Here are few easy tips to guide you.

  • Lean chicken, turkey, tuna, salmon, hard-boiled eggs, egg whites, or low-fat cheese
  • Vegetarian: tofu, beans and legumes, such as black beans, lentils, garbanzo beans, and kidney beans.
  • Avoid high fat and processed meats, such as bacon and salami, due to their link to increased cancer risk.
  • 1 serving of animal protein is 3 ounces or a deck of cards (~90-100 calories).
  • 1 serving of vegetarian protein is ½ cup of cubed tofu or ¾ cup of beans and legumes.


Don’t Forget the Fruits:

IMG_6825

If your taste preferences allow this, adding sliced fresh fruit to your salad can help pack in the antioxidant power.

Use sliced fresh and seasonal fruit, drained canned fruit, or dried fruits without added sugar.

Commonly used fruits:

  • Tomatoes
  • Apples
  • Pears
  • Strawberries
  • Blueberries
  • Peaches
  • Raspberries

Fats and Flavors:

IMG_6826
Fresh mozzarella cheese added here.

Limit yourself to 1-2 flavor boosters per salad due to energy density per serving.

40-70 calories each. Keep a close eye on your serving size here!

  • Examples:
    • 2 Tbsp goat, feta, or mozzarella cheese
    • 1 Tbsp chopped walnuts, pecans, or sliced almonds
    • 1 Tbsp sunflower or pumpkin seeds
    • 1 oz or ¼ of a whole avocado
    • ¼ cup croutons
    • 10 olives
    • 2 Tbsp. dried cranberries

Giddy about Grains:

IMG_6828

Serve on a salad warm or cold. Choose whole grains over refined grains (i.e. croutons, tortilla chips, etc.)

  • Whole grains: quinoa, farro, barley, bulgar, whole wheat couscous, etc.

The serving size for whole grains is generally ½ cup cooked.

Try a popped whole grain, such as sorghum, amaranth, or quinoa for a crunch!

 Dress Lightly:

IMG_6831
Final product: Dressed lightly with 1 Tbsp of extra virgin olive oil and 1 tsp lemon juice.

Opt for a vinaigrette-based dressing over a cream dressing for less fat and calories.

Make your own vinaigrette to avoid any preservatives from store-bought dressings.

  • Other key ingredients for homemade vinaigrette: lemon juice, vinegars (apple cider, balsamic, white, red wine, rice), mustard, fresh herbs, spices, fruit jam, honey, etc.
  • Goal: < 1-2 Tbsp. dressing for an entrée salad
  • To make your own vinaigrette, remember 1 part oil to 3 parts vinegar


Enjoy!

-EAW


Posted on 1 Comment

Quinoa & Vegetable-Stuffed Peppers

Hello friends!

It has been a while due to my recent vacation to Florida and kicking off spring time in Michigan, which equates to a ton of time spent outside (yay!!). I’m going to keep this post short and sweet, but I have lots of fun posts coming your way this summer. Your guide to healthy grilling, the scoop on the healthiest oils and fats for cooking, and new ways to use beets are just some of the many things to come. Stay tuned 🙂

This recipe is a great meatless Monday or vegetarian option to have any day of the week. Stuffed peppers are one of my favorite, go-to weeknight dinners. I think it is potentially one of only a couple vegetarian recipes that doesn’t leave my boyfriend asking, “where is the protein?” at the end of the meal. Between the protein from the quinoa and black beans, the stuffing in these peppers leaves you feeling completely satiated. The fact that these are plant-based proteins is just the icing on the cake. Why is this important?

A plant-based diet, which emphasizes intake of fruits, vegetables, legumes, whole grains, and limits intake of red or processed meat and refined sugars, is nutrient-dense and helps reduce inflammation in the body. Keeping inflammation at bay in the body means reduced risk of becoming overweight/obese and chronic diseases, such as heart disease, diabetes, and cancer. While there is still a place for red meat, chicken, turkey, and pork in a healthy, balanced diet, plant-based proteins, such as legumes, nuts, seeds, and tofu deserve time in the spotlight as well.

Healthy-Plant-Based-Protein
http://www.myhdiet.com/healthnews/cancer-news/5-healthy-plant-based-protein-sources/

Lastly, because this recipe uses vegetables and plant-based proteins as its foundation, you are receiving at least 1-2 servings of vegetables per serving, making you closer to the daily requirement of at least 3-5 servings of fruits and vegetables. So enjoy this tasty recipe and be sure to add it to your rotating cycle of favorite weeknight dinners!

Quinoa and Vegetable-Stuffed Bell Peppers

Stuffed bell pepper pic

Yield: 6 bell pepper halves

Serving: 1/2 bell pepper

Prep time: 15-20 minutes, Cook time: 25-30 minutes, Total time: 50 minutes

Ingredients:

  • 3 Bell peppers (color of your choice), cut length-wise and seeds/insides removed
  • 1-15 oz can reduced sodium black beans
  • 3/4 cup dry quinoa
  • 1 1/2 cups reduced sodium vegetable stock
  • 1/2 yellow onion, diced
  • 4 cloves garlic, minced
  • 2 cups raw spinach, de-stemmed and rinsed
  • 1 cup cherry tomatoes, quartered
  • 1 Tbsp extra virgin olive oil
  • 1/4 cup fresh basil, chopped
  • 1/4 tsp dried basil
  • 1/4 tsp dried oregano
  • 1 cup shredded reduced-fat mozzarella cheese
  • Salt and pepper to taste

Directions:

  1. Line a baking sheet with aluminum foil and grease with cooking spray. Wash bell peppers, slice in half length-wise, and remove the seeds and white insides. Place on the greased baking sheet and set aside.
  2. Slice, mince, and dice the tomatoes, garlic, and onion. Set aside.
  3. Combine quinoa and vegetable stock and bring to a boil. Once boiling, cover and simmer for 15-20 minutes or until fully cooked.
  4. While the quinoa is cooking, broil the bell pepper halves for 10 minutes. Set aside. Adjust oven temperature to 375° F.
  5. Next, add oil to a medium saute pan and bring to medium heat. Saute the garlic, onion, and tomatoes for about 5-7 minutes. Add basil (both fresh and dried), oregano, salt and pepper. Add black beans and spinach and turn to low once spinach starts to wilt (about 1-2 minutes).
  6. Once the quinoa is cooked, add the quinoa to the black bean, spinach mixture and stir until the quinoa is evenly distributed.
  7. Carefully scoop and fill each pepper half with the quinoa mixture. Roast the peppers for 10 minutes. Remove the pan from the oven and sprinkle the top of each pepper with the mozzarella cheese. Place back in the oven for 10-15 minutes until cheese is melted and lightly brown.
  8. Sprinkle with fresh basil (optional) and serve immediately.

Enjoy!

-EAW


Posted on Leave a comment

Colorless Foods: Part of a healthy rainbow?

My segment on WZZM 13 this week featured tips on whether or not colorless foods have a place in a healthy diet. Americans often get advice from dietitians to color their plate and eat the rainbow to ensure their diet is packed with antioxidants and adequate vitamins and minerals. Specifically, deep blue hues from different berries are packed with anthocyanins, bright orange and green-colored vegetables, such as bell peppers and kale are chalk of the anti-oxidant, beta-carotene.

Berries
blog.arthritis.org

These antioxidants help fight off inflammation and free radical damage in the body. And these foods are still very important for this reason. However, some colorless foods definitely deserve a spot on your plate for their healthy nutrient content.

In recent years, colorless foods have received a very bad reputation. And most for good reason! Foods, such as white bread, white sugar, white flour, and white bread often lack nutrition quality, dietary fiber, protective antioxidants, and as many vitamins and minerals as their healthier whole grain or complex carbohydrate counterparts. However, there are colorless foods that should make a regular appearance in your diet due to their anti-oxidant properties and vitamin/mineral content. Let’s talk about four colorless foods to start incorporating in your diet now:

Want to skip to the video? Click here.

Colorless food selfie at WZZM

Bananas. Bananas often get a bad reputation due to their sugar content, but it’s important to remember where the sugar is coming from. Sugar from fresh fruit is a natural sugar that are often digested differently based on the fiber content. Bananas are not only a good source of fiber, but they are also good sources of potassium, vitamin B6, magnesium, vitamin C, folate, and niacin. Eat bananas whole or mix with yogurt and a nut butter for a healthy snack between meals.

Potatoes. “Too many carbs!” is the most frequent statement I hear from patients when we talk about potatoes. The truth is your body needs the right type of carbohydrates for energy and to function properly. Glycemic index is measurement of a food’s effect on an individuals’ blood sugar level. A higher glycemic index food may cause greater spikes in blood sugar due to rapidly-absorbed simple carbohydrates. As a result, a higher glycemic index diet may contribute to insulin resistance, a precursor for Type 2 Diabetes. For example, baked Russet potatoes only have a moderately high glycemic index, as opposed to a higher glycemic index from instant, white mashed potatoes. Potatoes (with the skin on!) are a great source of potassium, fiber, vitamin C, vitamin B6, folate, and magnesium.

Colorless food pic at the studio

Mushrooms. Mushrooms are a good source of selenium, potassium, niacin, copper, and iron. They also provide a small amount of vitamin D and protein. Mushrooms also provide a small amount of choline, a vitamin-like nutrient that may improve memory and muscle function. Mushrooms are also incredibly versatile! Add them raw to salads, cook them with different vegetables such as onions, or use them as a substitute for beef for meatless burger option.

Cauliflower. This cruciferous vegetable is high on the list for nutrition quality. Cauliflower is great source of vitamin C and a good source of B vitamins, dietary fiber, and manganese. Due to the phytochemical content from glucosinolates in cruciferous vegetables, such as cauliflower and broccoli, these vegetables have been linked to cancer prevention. Cauliflower makes a great low carbohydrate option for several recipes, such as cauliflower rice, mashed cauliflower, or cauliflower pizza crust.

These are just some of the many colorless foods that deserve a place on your plate and in your dietary rainbow. Be sure to try ginger, white nectarines, jicama, parsnips, turnips, artichokes, garlic, and onions for their own unique flavor and nutrient profiles that can benefit your diet.


-EAW


Resources:

http://www.theglobeandmail.com/life/health-and-fitness/health/leslie-beck-five-colourless-foods-that-belong-in-your-diet/article34701632/?service=print

https://www.ncbi.nlm.nih.gov/pubmed/15800557

http://www.fruitsandveggiesmorematters.org/fruit-and-veggie-color-list


Posted on 3 Comments

Turmeric Recipes and Health Benefits

Although turmeric has been around for thousands of years, it has just recently gained more popularity due its antioxidant, anti-cancer, and anti-inflammatory properties. It has been deemed a so-called “superfood” (not a real thing, but I digress) due to these potential health benefits.

Turmeric is an herbaceous perennial plant of the ginger family and is native to southern Asia. It has been classically used as a spice in curries, but other uses include therapy in alternative medicine and dyes due to its beautiful orange hue.

Image result for turmeric
http://www.everydaytalks.com

Curcumin is the principal ingredient in turmeric that contributes the yellow, orange pigment and contributes to these antioxidant properties.

In research, turmeric has shown promising results for anti-cancer and anti-inflammatory effects. However, there is a lack of “gold standard” research available aka double-blind, randomized, controlled trials with large sample groups to discern the exact mechanism of turmeric in the body and therefore, it is not yet feasible to make concrete recommendations. In addition, there is also lack of data on toxicity, dosage, and availability of turmeric. Moral of the story, more quality research needs to be done in order to determine turmeric’s exact mechanism in the body and exact dosage recommendations.

With that being said, having looked through research on turmeric, I would opt to use it in your cooking than not due to the optimistic anti-inflammatory effects. You can use it in sweet or savory recipes. It is incredibly versatile!

  • Savory:
    • Protein marinades
    • Curries
    • Eggs
    • Hummus
    • Vegetable side dishes
    • Stir fries or other Asian dishes
    • Soups
  • Sweet:
    • Energy bites
    • Smoothies
    • Baked goods (cookies, muffins, or pastries)
    • Add it to tea with milk and honey

Here are just a few of the recipes that I really enjoyed turmeric in. Next on this list…turmeric hummus and turmeric poached eggs. I mean truly what can’t you add turmeric to?!

Turmeric Energy Bites

IMG_6750

Yield: 17-18 bites

Ingredients:

  • 1 cup old-fashioned oats (~1/2 cup oat flour)
  • 1/2 tsp ground cinnamon
  • 1 tsp turmeric
  • 1 Tbsp 1 tsp ground flaxseed
  • 1 Tbsp wildflower honey
  • 1 cup peanut butter or other nut butter
  • 2 Tbsp soy milk
  • Optional coatings: crushed walnuts, shredded coconut, turmeric, or crushed pistachios

Directions:

  1. Add oats to a food processor or Ninja blender and pulse until powder-form.
  2. Combine oat flour, cinnamon, turmeric, flaxseed in a small bowl and mix until evenly distributed.
  3. In medium bowl, mix honey, peanut butter, and soy milk. Slowly add the flour mix to the nut butter bowl. You can either mix slowly with an electric mixer or combine the mixture with your hands.
  4. Place your desired coatings in small, separate bowls. Roll the dough into small balls and roll in desired toppings. Refrigerate or freeze.

IMG_6754

IMG_6761

Turmeric Yogurt

This easy yogurt dish is oddly addicting. Maybe it was something about the bright yellow color or creaminess of the yogurt combined with the peanut butter. Either way, I’m sold! This makes a great breakfast, snack, or healthy dessert option. It’s also packed with protein from the Greek yogurt and nut butter!

Turmeric smoothie bowl

Ingredients:

  • 1 1/2 cup plain Greek yogurt
  • 1/4 tsp turmeric
  • 1 Tbsp 100% pure maple syrup
  • 1/8 tsp ground ginger
  • 2 Tbsp soy milk (or your milk of choice)
  • 1 Tbsp peanut butter or other nut butter
  • Optional toppings: fruit of your choice, crushed pistachios, chia seeds

Directions:

Combine yogurt, turmeric, maple syrup, ginger, milk, and peanut butter in a bowl. Top with your favorite fruit or nuts. Enjoy immediately or refrigerate.

Turmeric Smoothie

Turmeric Smoothie

Yield: 8 oz smoothie

Ingredients:

  • 1 Tbsp fresh ginger, minced
  • 1/2 fresh banana
  • 1/4 cup plain Greek yogurt
  • 1/2 cup soy milk (or your milk of choice)
  • 1/4 tsp turmeric
  • 1/4 tsp vanilla extract
  • 1/4 tsp pure Michigan wildflower honey
  • 4 ice cubes
  • pinch of cloves (optional)

Directions:

  • Combine all the ingredients in a blender or Ninja and pulse until smooth. Enjoy immediately or refrigerate/freeze for later.

Enjoy!

-EAW

Posted on Leave a comment

Nutrition Facts Label Decoded

With so much information available on food labels, it can be difficult to navigate and figure out what’s really best for your body.

I had a really fun discussion with WZZM 13 news yesterday morning about how to best navigate those confusing food labels and why to be cautious about health claims. Check out the video here!

http://www.wzzm13.com/entertainment/television/programs/my-west-michigan/de-coding-food-labels-to-make-healthy-lifestyle-choices/428463693

FullSizeRender

Marketing of food items affects how we as consumers purchase foods and this proves true with foods that we think are nutritious. A recent study from the Journal of the Academy of Nutrition and Dietetics revealed that individuals were more likely to purchase snacks with health claims even if they are not the most nutritious. Health claims can include organic, low-fat, all-natural, reduced sodium, etc.

In particular, participants in this study were 30% less likely to use the Nutrition Facts label before their purchase if a nutrient content claim was on the front of the package. Although only 10% of participants opted to look at the Nutrition Facts label, those that did were 5 times more likely to choose the healthier option. These results only cement the need for consumers to be their own health advocates and understand how to navigate food labels for healthy foods.

Guide to navigating food labels

Sample Nutrition Facts label:

Current_Label_notitle_NFL_3.24.14

1. Start with the serving size. Look at the serving size and total servings per container. Then ask yourself, “Am I going to consume more than one serving”? If the answer is yes, then be sure to double the total nutrient numbers (i.e. calories, grams of fat, etc.).

2. The Rule of 3. Know which nutrients to limit and which to get more of. The top three nutrients, fat, cholesterol, and sodium are all nutrients to keep your intake the least of as part of a healthy, balanced diet. However, intake of the right type of carbohydrates, dietary fiber, and adequate vitamins and minerals, such as calcium, are nutrients to make sure you get enough of.

3. Understanding the percent daily value. Knowing that 5 percent DV or less is low and 20 percent DV or more is high is an easy rule of thumb to remember. Always remember to double these percentages as needed if you are consuming more than one serving.

Take away message(s):

  • Don’t depend on health claims to determine the nutrition quality of a food.
  • When in doubt, check the nutrition facts label! I know it can be scary, but by just looking at the nutrition facts label, you are more likely to make a healthier choice.
  •  If this is still very confusing to you, start by shopping the perimeter of the grocery store to increase your probability of purchasing fresh and healthy ingredients.
  • Better yet, focus on using the MyPlate method by filling your plate with nutrient-dense foods, such as fruits, vegetables, whole grains and legumes that don’t need health claims to make them healthy.

MyPlate icon

Have a great Thursday everyone!

-EAW


Posted on Leave a comment

My Pesto Manifesto

Why I am writing a pesto manifesto?

As opposed to most manifesto’s, this one is short and sweet.

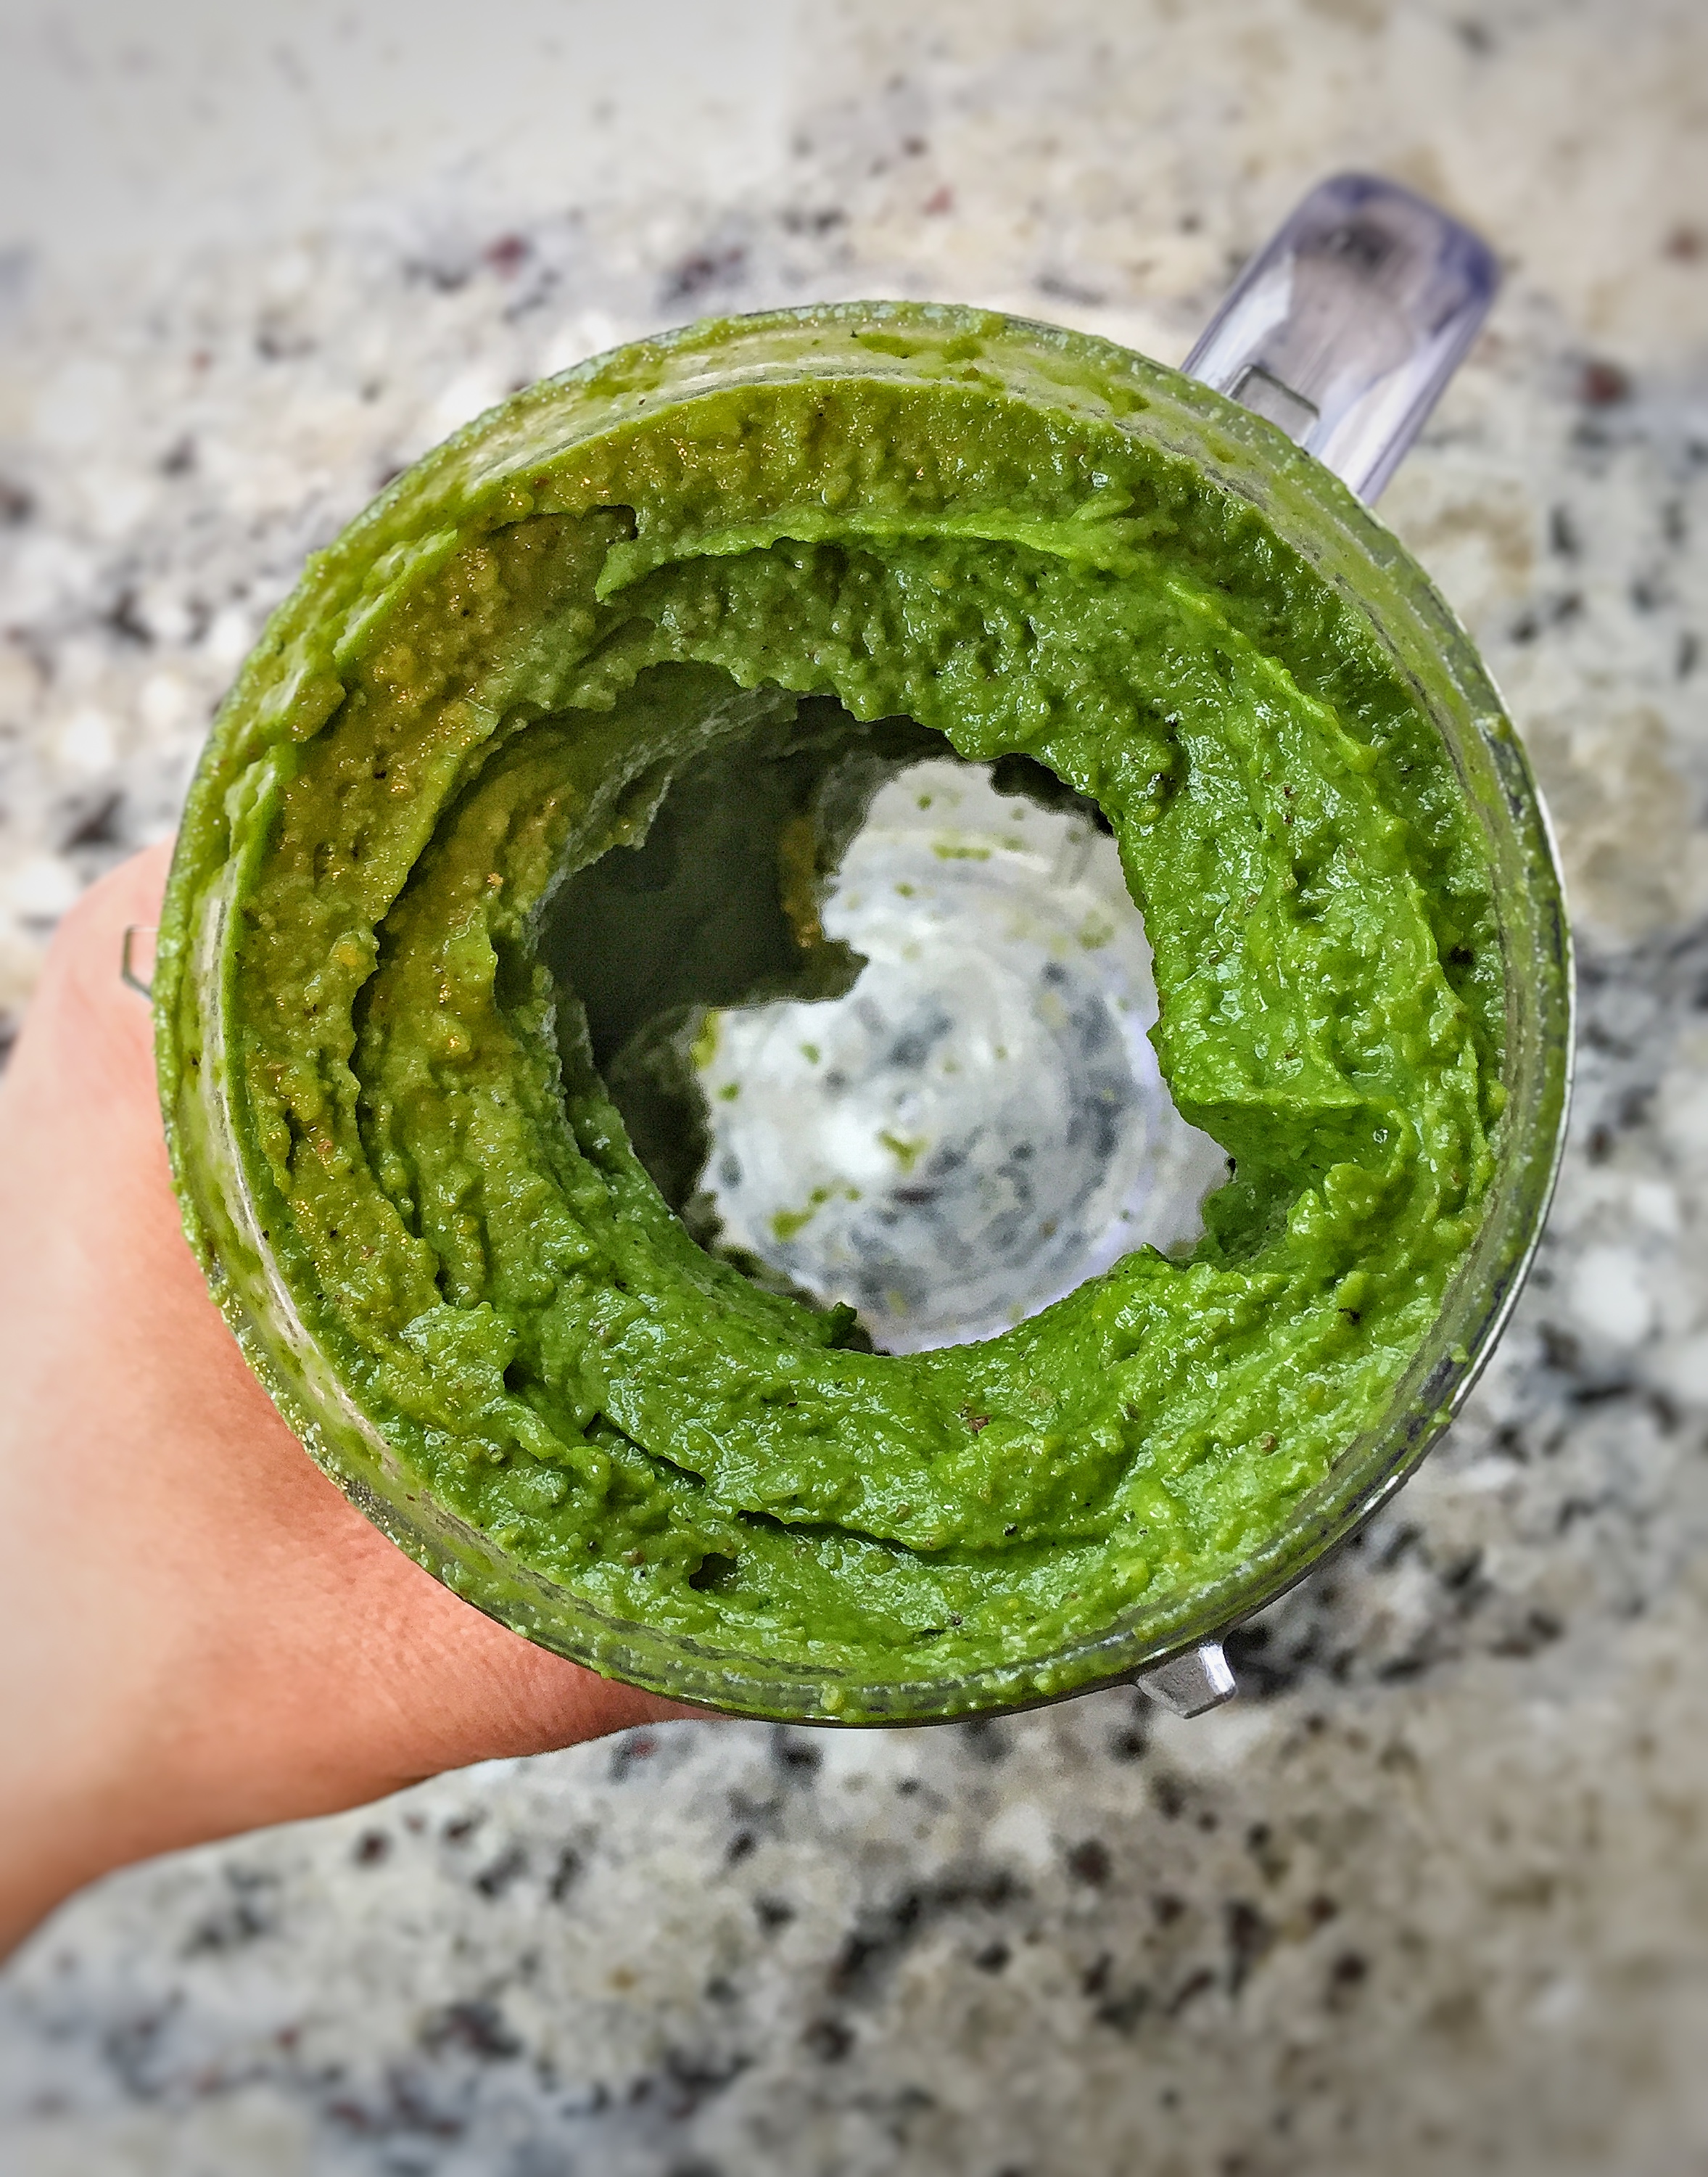
Next time you grab your favorite pre-made pasta sauce or pesto at the store, check the label. These sauces are not only expensive, but are also chock-full of sugar, salt, or both. A half cup of pre-made pasta sauce can pack in 10 grams of added sugar and 430-480 milligrams of sodium. This equates to 27-41% of the recommended daily added sugar intake and 20-25% of recommended daily salt intake. Sometimes as a society, we forget that pasta sauces or pestos aren’t grown in a jar in the grocery store. We have adapted to the convenience of picking these items up at the grocery, but quite frankly, these are some of the easiest things to make at home…SERIOUSLY…so…easy. Once I got started on my pesto kick, I couldn’t stop. The beauty of making pesto or pasta sauces from scratch is you can add as much or as little salt, fresh ingredients, oil, or spices you desire. I made basil walnut pesto, lemon pistachio pesto, and sun-dried tomato pine nut pesto.

The key to a good pesto:

  • Fresh herbs or leafy greens: basil, oregano, sage, arugula, spinach, etc.
  • Nuts or seeds: Pistachios, pine nuts, walnuts, almonds, cashews, sunflower seeds, etc.
  • Oil: olive oil is the most common (I used extra virgin)
  • Cheese: Parmigiano Reggiano, Pecorino Fiore Sardo, and Pecorino Romano
  • Other optional add-ins: lemon juice, garlic, sun-dried tomatoes, etc.
  • Salt and pepper
  • Mortar-and-pestle or food processor

How to eat pesto:

  • Pasta
  • Artisan bread as a bruschetta
  • Whole grain toast with a poached or fried egg (my fav!)
  • Whole grain crackers
  • Drizzled on roasted vegetables, meat, or fish

FullSizeRender_1

Basil Walnut Pesto

FullSizeRender

  • Ingredients:
    • 2 garlic cloves
    • 1 cup packed fresh basil leaves
    • 1/2 cup walnuts (I used toasted walnuts to add a nutty flavor)
    • 1/3 cup extra-virgin olive oil
    • juice from half a lemon
    • dash of salt and pepper
  • Directions:
    • Add all ingredients to a food processor and pulse until smooth.

IMG_6223

IMG_6333

Pistachio Lemon Pesto

FullSizeRender

  • Ingredients:
    • 1/4 cup extra virgin olive oil
    • 1/3 cup pistachios
    • 3 garlic gloves
    • 1 cup fresh spinach, rinsed and de-stemmed
    • juice from half a lemon (~3 Tbsp.)
    • dash of salt and pepper
  • Directions:
    • Add all ingredients to a food processor and pulse until desired smoothness.

FullSizeRender_2

Sun-dried Tomato Pine Nut Pesto

FullSizeRender_1

  • Ingredients:
    • 1/4 cup extra virgin olive oil
    • 1/3 cup sun-dried tomatoes
    • 3/4 cup fresh spinach, rinsed and de-stemmed
    • 1/4 cup pine nuts
    • 2 Tbsp. grated Parmesan cheese
    • 2 garlic cloves
    • dash of salt and pepper
  • Directions:
    • Add all ingredients to a food processor and pulse until desired smoothness.

FullSizeRender_2

Enjoy!

-EAW


Posted on Leave a comment

Pickling 101

I recently finished a fictional novel One Second After by William R. Forstchen. The book is about the aftermath of an electromagnetic pulse (EMP) hitting the United States. Now I’m sure you are asking yourself “what is an EMP”? Time to nerd out for a second…an EMP is the result of a nuclear warhead being detonated miles above the Earth’s surface. An EMP emits blasts of gamma radiation which alter the magnetic and electric fields on Earth’s surface and ultimately permanently damage all of our electronics. And this would not be just a brief power outage. This would mean you cannot use any of these electronics again. That includes most cars nowadays, computers, phones, any outlets therefore, refrigeration and your freezer are also SOL. In other words, we are put back in the stone ages. The need to hunt and gather becomes our new reality.

This book really hit home with the reality of our food dependence as a society. Many kids and even adults don’t know where some of our food comes from, such as cuts of meat or fruits and vegetables. Some of us have not been challenged to think about where our food comes from. This book reminded me of the importance of knowing where food comes from, not only for the sake of understanding our food system, but also to teach myself skills that allow me to not be as dependent on grocery stores. God forbid, if something like this did actually happen in our time, I would have the skills to preserve food for longer periods of time.

When I think about pickling or canning, I immediately think of my grandparents. They are really the only people I remember actually pickling and canning food when I was a kid. Now, most people buy their canned or pickled goods in the grocery store. Pickling or canning now almost seems a little medieval really. However, pickling and canning can be a great skill to preserve any extra produce from your garden or even from the grocery store. Pickling has been used in different cultures for centuries, such as the Germans with sauerkraut (pickled cabbage) and Koreans with kimchi (fermented napa cabbage, radish, scallions, garlic, ginger, and cucumber). Pickling has also had a surge in the foodie world. It creates a twist on acidic flavors and allows chefs to be more eco-friendly by preserving certain produce for longer periods of time.

Pickling expands the lifespan of food through fermentation with brine or vinegar, which kills most bacteria and lowers the pH or acidity level. This fermentation process affects the texture and flavor of the food. Pickled foods can last up to 5-6 months. As opposed to canning, the food does not need to be completely sterile before sealing. The fermentation process, level of acidity, and lack of oxygen help kill the bacteria and alter the flavor of the food.

Basic pickling includes:

  • Salt (and sometimes sugar as well)
  • Vinegar
  • Desired fruit or vegetable
  • Desired spices (common ones: mustard seed, garlic, cinnamon, cloves)

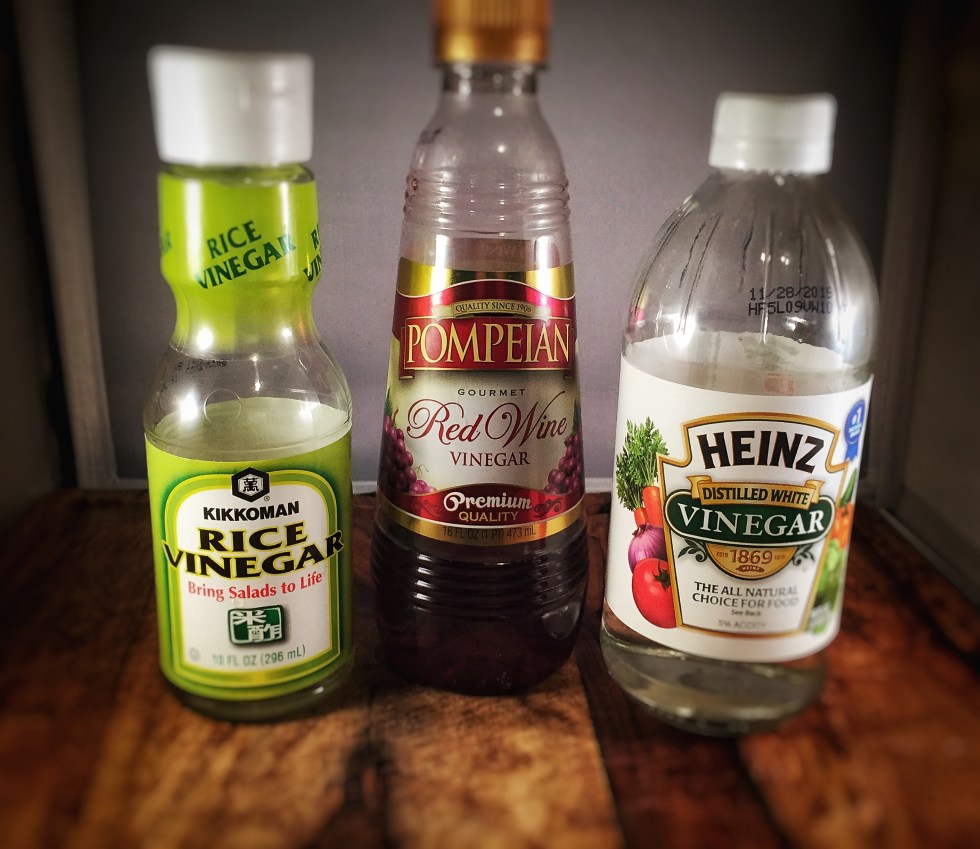
You can use a wide array of vinegars (white, red wine, balsamic, rice wine, apple cider, Sherry, white wine, etc.). I used red wine, white, and rice wine vinegar and made pickled cucumbers with onion, ginger, and radishes. See below for these recipes!

FullSizeRender_3

How to use pickled fruits and vegetables:

  • Add to fresh salads.
  • Serve pickled radishes with a sunny side egg.
  • Top your sushi with homemade pickled ginger.
  • Dip pickled vegetables in hummus.
  • Enjoy as a stand-alone side dish with lunch or dinner.
  • Add to an antipasto appetizer platter.
  • Add to your favorite sandwich (i.e. Banh mi).

Health Benefits:

  • Fermentation during pickling creates probiotics.
  • Probiotics are live microorganisms that are intended to have health benefits.
  • The potential health benefits of probiotics still requires more research, but some evidence has demonstrated that probiotics may help promote healthy gut flora, which in turn can help regulate gut function.
  • Other probiotic-containing foods: yogurt, Kefir, kombucha, kimchi, sauerkraut, tempeh, etc.

IMG_6075

Utensils:

  • Cutting board
  • Chef’s knife
  • Vegetable peeler
  • Mandoline slicer
  • Pint size mason jars (wash all needed jars with soapy water, rinse, and dry before using)
  • Measuring cups and spoons


Pickled Ginger

FullSizeRender

  • Yield: 1 mason jar full
  •  Ingredients:
    • 12 oz fresh ginger (2-3 big roots)
    • 1 red radish
    • 1 1/2 Tbsp Kosher salt
    • 1 1/2 Tbsp granulated sugar
    • 1/2 cup rice wine vinegar
    • 1 cup water
  • Directions:
    • Peel the outer layer of the ginger root and discard.
    • Using a mandoline slicer, slice the ginger root into small pieces.
    • In a small bowl, toss ginger with the salt and set aside for 30 minutes.
    • Wash a radish, slice off the root end, and slice thinly using the mandolin slicer.
    • Add radish then ginger to the mason jar.
    • In a small saucepan, bring the vinegar, sugar, and water to a boil. Once the sugar is dissolved, remove pan from the heat and let it cool to room temperature.
    • Once cooled, add the vinegar mixture to the mason jar and seal tightly. Store in the refrigerator.

Pickled Radishes

  • Yield: 1 mason jar full
  •  Ingredients:
    • 1 bunch of radishes (~8-10 radishes)
    • 1/2 cup red wine vinegar
    • 1/2 cup water
    • 1 1/2 tsp Kosher salt
    • 1 Tbsp granulated sugar

Pickled Radishes

  • Directions:
    • Wash the radishes and cut off the root ends.
    • Slice thinly with a knife or with mandoline slicer.
    • Pack sliced radishes into a mason jar.
    • Whisk the vinegar, water, salt, and sugar in a small bowl and add to jar.
    • Refrigerate for at least 15 minutes before serving.


Spicy-Sweet Pickled Cucumbers

FullSizeRender_2

  • Yield: 1 mason jar full
  •  Ingredients:
    • 1/4 cup sliced onion (I used yellow onion)
    • 1/4 tsp red chili flakes
    • 1-2 Tbsp fresh lime juice
    • 3 1/2 Tbsp brown sugar, packed
    • 1 tsp Kosher salt
    • 1/2 cup white vinegar (rice wine vinegar can also be used)
    • 1 English cucumber

FullSizeRender_1

  • Directions:
    • Using a mandoline slicer or sharp knife, slice the cucumber and onion.
    • In a saucepan, bring chili flakes, lime juice, brown sugar, salt, and vinegar to a boil. Once the sugar is dissolved, remove pan from the heat.
    • Add vinegar mixture to cucumbers and onion in a medium sized bowl.
    • Once at room temperature, add the brine with cucumbers and onion to the mason jar.
    • Seal tightly and refrigerate.

FullSizeRender_4


Enjoy!

-EAW