Posted on Leave a comment

How to stay healthy while spending more time outside

Warmer weather is finally here in West Michigan! Many of us can’t wait to dust off those bicycles and spend more time outside.

As eager as we are to get a nice big ice cream cone from the local creamery, we do need to keep our health at the forefront.

Here are some easy ways to spend that time outside (and not in the kitchen!) without sacrificing your health:

Watch my WZZM 13 segment here!

Grill smarter! Grilling season is here! We all love a big, juicy burger off the grill to kick off warmer weather. Grilling is a great way to enjoy the outdoors while cooking, but keep in mind grilling can have some potential health concerns, especially if you are only cooking high saturated fat foods, such as burgers or steak, and charring your meats at extremely high heat (>300 degrees). If grilling is your specialty, make an effort to include leaner meats, fruits, and vegetables. Grilled vegetable skewers offer a great punch of flavor and antioxidants that may help offset the potential carcinogenic HCAs from grilling meats at high heat.

IMG_7202.JPG

Throw a vegetarian bonfire party! Ok, so you probably don’t need to call it that when you invite friends over for a bonfire, but hey, using fun veggie or fruit-based recipes with campfire cast irons or roasting extension forks is a great way to spend time outside while eating healthy. S’mores and hot dogs will always be a staple, but spicing it up with new veggie-based recipes is a fun way to involve kids in cooking while promoting better consumption of fruits and vegetables. Try some of these recipe ideas using campfire cast irons:

  • Apple Cheddar Panini – whole grain bread, sliced Granny smith apples, part-skim Swiss cheese, Dijon mustard
  • Vegetable Pizza Calzone – whole grain bread, pizza sauce (low sodium if available), basil, light or part-skim mozzarella cheese, and choice of vegetables (mushrooms, onions, bell peppers, tomatoes, etc.) IMG_1997
  • Apple Cinnamon Pie – whole grain cinnamon raisin bread, cinnamon, sliced apples, unsweetened cinnamon apple sauce
  • Banana Foster – whole grain cinnamon raisin bread (I used Aunt Millie’s), 1/2 banana (sliced lengthwise), cinnamon, rum or coconut extract, coconut or vanilla yogurt IMG_1999

Start a garden! Although this may seem labor-intensive initially, your hard work will equate to less time spent inside a grocery store later. There are many levels of gardening. If you are intimidated about how to get started, start small. Start with just herbs or 1-2 vegetables that you know you and your family eat on a regular basis. Avoid planting too much at one time. Still feeling nervous? Use pre-potted plants or herbs instead of growing from seeds. Flowerland is a great place to start and has a ton of options to choose from.

IMG_2081

Utilize one-sheet pan or 5-ingredient or less recipes! Sticking to one-sheet pan dinners or five ingredients or less is an easy way to avoid excess time in the kitchen. Cooking and eating healthy does not have to be complicated. Pinterest is my go-to for easy recipes by searching for 5 or 10-ingredient or less recipes.

Try these one-sheet or 5-ingredient or less healthy recipes to get you started:

Sheet-pan Chicken Fajitas (Eatingwell.com)

IMG_7195

Prep time: 20 mins, Total time: 40 mins

Ingredients:

  • 1 pound boneless, skinless chicken breasts
  • 2 tablespoons extra-virgin olive oil
  • 1 tablespoon chili powder
  • 2 teaspoons ground cumin
  • 1 teaspoon garlic powder
  • ¾ teaspoon salt
  • 1 large red bell pepper, sliced
  • 1 large yellow bell pepper, sliced
  • 2 cups sliced red or yellow onion (about 1 large)
  • 1 tablespoon lime juice
  • 8 corn tortillas, warmed

Lime wedges, cilantro, sour cream, avocado and/or pico de gallo for serving (optional)

Directions:

  1. Preheat oven to 400°F. Coat a large rimmed baking sheet with cooking spray.
  2. Cut chicken breasts in half horizontally, then slice crosswise into strips. Combine oil, chili powder, cumin, garlic powder and salt in a large bowl. Add the chicken and stir to coat with the spice mixture. Add bell peppers and onion and stir to combine. Transfer the chicken and vegetables to the prepared baking sheet and spread in an even layer.
  3. Roast on the middle rack for 15 minutes. Leave the pan there and turn the broiler to high. Broil until the chicken is cooked through and the vegetables are browning in spots, about 5 minutes more. Remove from oven. Stir in lime juice.
  4. Serve the chicken and vegetables in warmed tortillas accompanied by lime wedges and topped with cilantro, sour cream, avocado and/or pico de gallo, if desired

Spinach, Hummus, and Bell Pepper Wraps (Cookinglight.com)

Total time: 10 mins

Servings: 2 wraps

Ingredients:

  • 2 (1.9-oz.) whole-grain flatbreads
  • 1/2 cup roasted garlic hummus
  • 1 small red bell pepper, thinly sliced
  • 1 cup firmly packed baby spinach
  • 1 ounce crumbled tomato-and-basil feta cheese (about 1/4 cup)

Directions:

  1. Spread each flatbread with 1/4 cup hummus, leaving a 1/2-inch border around the edge.
  2. Divide the bell pepper evenly between the flatbreads; top each with 1/2 cup spinach and 2 tablespoons cheese. Starting from one short side, roll up the wraps. Cut each wrap in half, and secure with wooden picks.

Cheers to the warm weather and Michigan summer approaching!

-EAW


Posted on Leave a comment

TOFU: Everything you need to know

When the word tofu gets mentioned, I often get a bewildered look from my patients as if I am asking them to try astronaut ice cream or alien food. Tofu is commonly used in Asian cuisine. It is made into a bean curd by coagulating soy milk and pressing the milk curds into a soft, white block.

Unfortunately, tofu often gets a bad rap for being tasteless or a “health” food. However, people often knock it before trying it or don’t prepare it correctly, resulting in an adverse flavor or texture. However, tofu has some really important health benefits that shouldn’t be overlooked. Not to mention, tofu can really take on some amazing flavor if prepared correctly.IMG_1778

Tofu is incredibly versatile and can be used in both sweet and savory dishes. It is low in calories and cholesterol, high in protein and a good source of isoflavones, phosphorus, iron, calcium, manganese, copper and selenium. Tofu is particularly useful for anyone trying to find ways to increase their protein intake without the risks of raising bad cholesterol. Now let’s talk about the need-to-know information on preparing and cooking tofu.

Watch my WZZM 13 segment here!

Prepping:

  • Eat raw: any tofu can be eaten raw, but most often silken or soft tofu is used for eating raw.
  • Draining and Pressing: With any tofu, be sure to drain off the water from the package before using. Tofu contains quite a bit of water, so it’s also important apply pressure to the whole block or slices of tofu to extract additional water. Place the tofu on a paper towel-covered plate with another paper towel on top of the block tofu. Next, place a canned good or baking sheet to apply more pressure. Allow about 5-10 minutes for the excess water to drain off.IMG_1772
  • Freezing: Freezing tofu is a great way to pull a good majority of the water from tofu. It is recommended to drain and press the tofu block before freezing. Similar to meat, it can be defrosted in the refrigerator or microwave.
  • Marinating and Glazing: Tofu is a great vehicle for flavor, just like any meat. Therefore, marinating it overnight (after pressing!) or even for 15-30 minutes prior to cooking will help when it comes to adding flavor. If baking, the key is to save some of the marinade for after the tofu is done cooking and brush the tofu with the remaining marinade right before serving. If pan-frying firm tofu with or without oil (canola, peanut, or extra-virgin olive oil), glaze the tofu pieces with the marinade throughout the cooking process. As the tofu continues to fry, re-glaze the tofu until it turns into a syrupy mix that clings to the tofu. This will lock in the marinade and flavor. Whether you are baking, broiling, pan-frying, or grilling, cooking time for tofu generally ranges between 20-30 minutes (flipping halfway through).

Types of tofu:

  • Firm or extra firm: this tofu can take on quite a bit of flavor and is perfect for pan-frying, sautéing, grilling, or roasting.
  • Medium: this tofu still can fall apart on you pretty easily. It is best added to soups or salads depending on your taste preference.
  • Soft/silken: Soft tofu is best eaten raw, lightly fried, or blended and added to recipes, such as a creamy savory sauce or fruit smoothie. Do not press soft tofu due to the soft texture and likelihood of it falling apart on you.

IMG_1832.jpg 

RECIPES:

Vanilla Banana-Nut SmoothieIMG_1770

Servings: 3-4 servings (1 cup each)

Ingredients:

  • 2 cups non-fat plain Greek yogurt
  • 1 cup unsweetened soy milk
  • 2 tsp vanilla extract
  • 1/3 cup cubed soft silken tofu
  • 1 1/2 banana, ripe or frozen
  • 2 tbsp. 100% natural creamy peanut butter
  • 1 tbsp. ground flax seed (optional)

Directions:

  1. Combine all ingredients in a blender until smooth.
  2. Serve immediately or freeze for later use.


Pineapple Stir Fry with Baked Tofu (courtesy of Veggie Inspired!)

Servings: 5

Ingredients:

Tofu

  • 1 lb firm tofu , drained, pressed*, and cubed
  • 2 tbsp soy sauce (or liquid aminos or tamari for a gluten free version)
  • 2 tbsp pineapple juice
  • 1/2 inch piece fresh ginger , peeled

Stir Fry

  • 3 garlic cloves (minced)
  • 1/2 inch piece fresh ginger (peeled and minced)
  • 3/4 cup diced carrot
  • 1/2 cup halved snow peas
  • 1/2 cup sliced water chestnuts
  • 3 scallions (sliced)
  • 2 cups cubed pineapple
  • about 1/2 cup water or broth for sautéing

Stir Fry Sauce

  • 3 tbsp tomato paste
  • 3 tbsp soy sauce (or tamari for gluten free)
  • 2 tbsp pineapple juice
  • 1 tbsp pure maple syrup
  • 1 tbsp rice wine vinegar
  • 1 tbsp cornstarch mixed with 1 tbsp water

Garnish, optional

  • sliced green onion
  • Sesame seeds
  • drizzle of sesame oil

Serve with your choice of brown or white rice.

Instructions:

  1. Press the tofu if you haven’t already — see note below. Cut it into cubes.
  2. Pour the marinade into a plastic Ziploc bag: 2 tbsp soy sauce, 2 tbsp pineapple juice and 1/2 inch of fresh peeled ginger. Add the cubed tofu and mix around so it’s all covered with marinade. Place in the fridge for at least 30 minutes.
  3. Preheat the oven to 400 degrees F. Line a baking sheet with parchment paper and set aside.
  4. When the tofu is done marinating, remove the tofu and place in a single layer on the prepared baking sheet. Bake for 25-30 minutes, flipping each piece half way through the cooking time.
  5. In the meantime, whisk together the stir fry sauce: tomato paste, 3 tbsp soy sauce, 2 tbsp pineapple juice, maple syrup, and vinegar. Mix together the cornstarch and water and add to the sauce. Whisk well and set aside.
  6. Heat a large skillet with 2 tbsp water (or broth) over medium-high heat. Add the garlic and ginger and sauté for 3 minutes.
  7. Add the carrots and 1/4 cup water (or broth), cover and let cook about 5-7 minutes. Check every few minutes and add more water/broth if the pan is getting dry. Add the snow peas, water chestnuts, scallions and pineapple chunks and cook another 2-3 minutes.
  8. Add the stir fry sauce and mix well. Add the baked tofu and mix again.
  9. Serve over rice and garnish with sliced green onions, sesame seeds and a sprinkle of sesame oil, if desired.

Recipe Notes:

*To press tofu – place paper towels or a clean dishcloth on a plate and place block of drained tofu on top. Cover with more paper towels or another clean dishcloth, add another plate on top, and weigh it down with whatever you have. I used bags of dried beans or grains.

*To save time, chop your veggies while the tofu is marinating. You can make the stir fry sauce at this time too.

*The stir fry comes together quickly if you have everything prepped ahead of time. Don’t start your stir fry until you have about 15 minutes left for baking the tofu. That way everything will be ready at the same time.


References:

https://www.thekitchn.com/tofu-varieties-whats-the-difference-201345

https://www.veggieinspired.com/pineapple-stir-fry/

https://www.seriouseats.com/2015/02/the-food-lab-how-to-grill-tofu-vegan-experience.html

-EAW

Posted on Leave a comment

Enhancing Flavor Without the Salt

February was National Heart Health Month but just because it’s March doesn’t mean it’s still not a great time to reflect on our dietary choices that may affect our heart health. March is National Nutrition Month after all. Hypertension or high blood pressure is one of the major risk factors for heart disease, the number one killer worldwide. High blood pressure is considered the “silent killer” because most individuals do not show symptoms or feel any differently. However, one-third of Americans either have high blood pressure or 90% are expected to develop it over their lifetimes.

IMG_7138

Excessive sodium intake is one of the main contributors to high blood pressure. Foods that are generally high in salt are pre-packaged or processed foods, salty snacks, canned soups, lunch meat, and frozen dinners.

So how much is too much sodium intake? The American Heart Association recommends an ideal sodium intake as 1500 milligrams per day with a limit of 2,300 mg per day (~1 teaspoon). Let’s talk about some ways to flavor foods without using too much salt.

Top 3 Tips:

  1. Increase acidity by using different vinegars or use bold herbs, roots, and seasonings. Instead of adding more salt, first start by adding acidity or tartness.IMG_7180.JPG
    • Vinegars: apple cider, balsamic, wine (red, white, and sherry), rice wine, malt, etc.
      • Balsamic and wine vinegars often used in Mediterranean and Israeli dishes
      • Malt vinegar is often used in fish and chip dishes in Canada and the United Kingdom
      • Rice wine vinegar is generally used in Asian-based cuisines or salad dressings
    • Lemon juice: this citrus pairs well with Italian dishes, such as shrimp scampi, vinaigrettes, grain-based salads, or vegetables, such as carrots, asparagus, or broccoli.
    • Lime juice: lime juice really elevates the flavor of Mexican dishes. Add to your guacamole, tacos, or top your margarita with a slice 😉 IMG_7192.JPG
    • Ginger, turmeric, horseradish
      • Ginger: a sweet, yet spicy bite that is commonly used in Asian cuisine, but can also be pickled for depth of flavor or paired with fresh fruit.
      • Turmeric: a little goes a long way with this earthy root that provides a bitter touch to Indian or Thai dishes. This root can also be used as a natural food coloring (hint, hint: Easter is coming!). For both ginger and turmeric, peel with a vegetable peeler or use a spoon to easily peel back the skin.IMG_7159.JPG
      • Horseradish: this root vegetable can be bought fresh or pre-prepared in a jar. Trying mixing with Greek yogurt or low-fat sour cream to create a delicious sauce to pair with a juicy steak.
    • Nutritional yeast as a healthy cheese substitute: this interesting little powder is jam-packed with B-vitamins, protein, fiber, and folate.
    • Fresh, dried, or canned peppers (poblano, chipotle, chili, etc.) to really add a kick!
  1. Marinate and infuse dishes with pureed fruits/vegetables.
    1. Marinate your proteins (fish, chicken, pork, beef, tofu, etc.) to avoid adding extra salt or seasoning after cooking.
    2. Infuse savory sauces with pureed butternut squash or cauliflower instead of extra salt or chicken broth for flavor dimension.
  2. Create sauces to top dishes with heart-healthy fats.
    1. Salads or vegetable sides:
      1. Avocado Crema using Greek yogurt (I love to pair this with sweet potato fries!)
      2. Chipotle Cashew Aioli
    2. Meats or Starches: Chimichurri (also one of my favorite sauces for huevos rancheros)
    3. Anything: Basil Walnut Pesto

**Be cautious with using a “Salt Replacement” for flavor enhancement if you take diuretics or have heart and/or kidney problems.


RECIPES


Avocado Crema

Avocado Crema.jpg

Ingredients:

  • 2 avocados, pitted
  • ½ cup, plain Greek yogurt
  • 2 Tbsp fresh lime juice
  • 1 Tbsp. unsweetened soy milk (optional)
  • 2 Tbsp. fresh cilantro, chopped

Directions:

  1. Place the avocado, yogurt, and lime juice in a food processor or blender. Pulse until evenly combined.
  2. Add a tablespoon of soy milk until desired consistency achieved.
  3. Fold in the cilantro or top as a garnish.
  4. Serve immediately or refrigerate for up to 1-2 days in an air-tight container.


5-Ingredient Chipotle Cashew Aioli

Cashew Sauce.jpg

Recipe by: The Minimalist Baker

Ingredients

  • 3/4 cup (90 g) raw cashews
  • 1/2 cup (120 ml) water (or unsweetened plain almond milk for creamier sauce)
  • 2 Tbsp (30 ml) lemon juice
  • 1/4 tsp sea salt
  • 1-2 tsp maple syrup or agave nectar (or sub organic cane sugar or stevia to taste)
  • 2-3 chipotle peppers in adobo sauce + 1 tsp adobo sauce (more or less to taste)
  • optional: 1-2 Tbsp avocado, grape seed, canola or other neutral oil (for creaminess)
  • optional: pinch smoked paprika

Instructions

  1. Add raw cashews to a mixing bowl (or a high-speed blender) and cover with boiling hot water. Let rest for 1 hour (uncovered). Then drain thoroughly.
  2. Add soaked, drained cashews to a high-speed blender with 1/2 cup water (or almond milk), lemon juice, sea salt, maple syrup, pepper + adobo sauce.
  3. Blend on high until creamy and smooth, adding more water or almond milk as needed to encourage blending. Scrape down sides as needed.
  4. Taste and adjust seasonings as needed, adding more salt to taste, lemon for acidity, maple syrup for sweetness, or adobo sauce for heat. I added more salt and another 2 chipotle peppers. Adding a little oil is optional and adds extra creaminess. Smoked paprika is also optional and adds a sweet smokiness to the sauce.
  5. Serve immediately or refrigerate. Leftovers will keep covered in the refrigerator up to 5 days.


Jalapeno Lime Chimichurri

Jalapeno Lime Chimichurri.jpg

Ingredients:

  • ¾ cup cilantro, chopped
  • 1 cup (or a small bunch) fresh parsley, chopped
  • ½ jalapeno, seeded and chopped
  • Juice of half a lime
  • 2 garlic cloves, minced
  • 1/3 cup extra virgin olive oil
  • ¼ cup red wine vinegar
  • 1/8 tsp. red pepper flakes (optional)
  • Salt and pepper to taste

Directions:

  1. Add all ingredients to a food processor or blender and pulse until smooth.
  2. Serve immediately or refrigerate for later use.


Basil Walnut Pesto

Basil Walnut Pesto.jpg

Ingredients:

  • 2 garlic cloves
  • 1 cup packed fresh basil leaves
  • 1/2 cup walnuts, toasted
  • 1/3 cup extra-virgin olive oil
  • juice from half a lemon
  • dash of salt and pepper

Directions:

  1. Add the walnuts to medium-size frying pan. Toast the walnuts evenly over medium heat until lightly browned (~3-4 minutes).
  2. Add all ingredients to a food processor and pulse until smooth.
  3. Refrigerate in a mason jar or an air-tight container for 5-7 days.


References:

https://sodiumbreakup.heart.org/sodium_and_your_health

https://minimalistbaker.com/5-ingredient-chipotle-aioli/


Posted on Leave a comment

Top 5 Common Diet Mistakes

Today is National Registered Dietitian Nutritionist Day so it only seems appropriate to address some of the most common blunders seen in the diet and nutrition world. It seems every day there is a new study coming out romanticizing which foods do or don’t improve health leaving the general public confused or taking extreme measures to better their diet. Here are some of the many things we see our clients struggle with.

Watch my WZZM 13 segment here!

Top 5 Common Diet Mistakes:

  1. A superfood or excessive intake of any one food can’t replace overall bad lifestyle habits. Consuming copious amounts of goji berries and matcha green tea won’t replace a sedentary lifestyle or fatty red meat intake every day. Practicing a healthy lifestyle and consuming a variety of fruits and vegetables, lean protein, low fat dairy, legumes, and complex carbohydrates are key to overall good health. This, in combination with consistent physical activity will have the biggest impact on your health long-term.IMG_7028
  2. All soy is bad. Whole soy foods, such as soymilk, edamame, tofu, or tempeh, in moderate amounts (1-2 servings per day) have actually been shown to potentially have a protective effect when it comes to cancer risk. One serving is 1-cup soymilk, ½ cup edamame, or 1/3-cup tofu. Soy additives in pre-packaged and processed foods are more along the lines of what you should be avoiding or limiting in your daily intake. But then again, you already should be avoiding too much processed foods due to salt content and overall general health.IMG_7151
  3. Focusing too much on foods you need to avoid instead foods you should make sure to include. This might range from whole food groups, such as carbs or fats, to specific foods, such as red meat, sweets, and “high-carb” bananas. I urge you to find what is going work best for you when it comes to a healthy diet. If you don’t want to sacrifice your red meat, then find a way to get >5 servings of fruits and vegetables daily or keep a conscientious eye on getting adequate healthy fats. IMG_7156
  4. Eliminating an entire food group. Carbs are good, no carbs are bad. Fats are good, no fats are bad. All food fits friends. Eliminating a single food group may work in the short-term to kick-start a diet, but it’s best to have a plan for transitioning back into a diet that is all-inclusive. Fat provides energy for the body to function, insulation for essential organs, helps hormones do their necessary work, and absorbs fat-soluble vitamins. Protein is the building block of muscle and helps repair tissues, while carbohydrates provide the main fuel source for bodily functions and can be the biggest contributor to dietary fiber intake. All food groups have important roles in the body. IMG_7073
  5. Following too restrictive of a meal plan. If I had a dime for every time someone asked me for a meal plan… Turns out, following a diet plan that I create for you is likely not the best option long term. You have to be able to “dodge and weave” when it comes to what life hands you, especially when it comes to diet and following a healthy lifestyle. They are going to be days where a coworker brings in a batch of cookies and you are tempted to dig in. The key is being flexible and not so hard on yourself. There are days you will indulge and days when you need to pass on the cookies. There will be more days where a sweet treat presents itself, but just know it shouldn’t always be a yes to indulging and shouldn’t always be a no to restricting. The key is balance. If you restrict yourself too much, you may find yourself feeling “hangry” (hungry and angry) or completely leaving a healthy diet behind because it was too restrictive to begin with. Focus on 1-2 aspects of your healthy lifestyle at a time, whether that be diet or fitness-related.

Although the news or social media platforms may have their hearts are in the right place when it comes to delivering nutrition information, you need to have a keen eye for the type of research the information is coming from. Do your due diligence and look at multiple different sources if possible. If it came from an animal or laboratory study, chances are we have an idea for a potential relationship, but still have no clue as to how this might work in humans yet. If you are still confused, find a local dietitian to consult with. The website eatright.org provides a search engine for finding dietitians located near you. We are happy to help answer all your diet and nutrition questions and direct you in leading a healthier lifestyle.

-EAW

Posted on 1 Comment

Plant-Based Diet: How to optimize your side dishes

A few weeks ago, we (as in myself, another dietitian, and our chef at the hospital) finished up our plant-based diet series on WZZM 13. We capped off the series with strategies for optimizing side dishes. In other words, how to make side dishes as nutritionally dense as possible. On average, at least 75% of Americans do not consume enough fruits and vegetables on a daily basis. Therefore, when it comes to following a plant-based diet, here are a few guidelines to follow to get the most antioxidant-packed side dishes.

Purchase what’s in season.

Buying produce that is in season or grown locally will not only taste better, but often save you money. What’s in season right now (winter) in West Michigan?

  • Apples
  • Onions
  • Potatoes
  • Beets
  • Brussel sprouts
  • Kale
  • Garlic
  • Cauliflower
  • Carrots
  • Clementines
  • Grapefruit

Buy locally at the Fulton Street Market on Saturday mornings or at the Downtown Market. Kingma’s Market also features produce and protein from local Michigan farms.

IMG_7077

Use a combination of pre-cut and fresh ingredients to save time.

Many of my patients find the idea of cutting a whole butternut squash a little daunting and as a result, they often just avoid it. No need! Science is an amazing thing and nowadays there is pre-cut butternut squash along with other vegetables in the produce section. Short on time? Buy a combination of pre-cut and whole, raw vegetables to create a healthy dinner without “slaving” in the kitchen. Note: Pre-cut vegetables tend to break down quicker so be sure to use them within a couple days of purchase. Really, really short on time? Use frozen, cubed butternut squash. You may sacrifice a little flavor, but nothing a little additional seasoning can’t fix. If buying frozen, avoid any frozen vegetables that come with added sauces.

IMG_7107

Aim for at least 3 fruits and/or vegetables in one dish.

The key to reducing your risk of chronic disease and cancer is variety! The more variety, the more likely you are to get a broader spectrum of antioxidants and nutrients. By including at least 3 fruits and/or vegetables in a side or main dish, you really pack in the maximum antioxidant and phytochemical power. An easy way to do this is utilizing one-sheet pans! They save on so much time and are perfect for a quick and healthy weeknight dinner.

IMG_7073.JPG

Try these options below for some of my favorite go-to plant-based side dishes. Keep in mind, any of these can easily be made into an entree by adding a protein (chicken, beef, pork, lentils, beans, tofu, etc.)

Be sure to check out the WZZM 13 visual guide here 🙂

-EAW

Posted on 1 Comment

Pear, Butternut Squash, and Pearl Onion Bake

Got some pears on the verge of being too ripe to eat? This recipe is a perfect way to use them up. This recipe is perfect for the fall or winter. It’s warm, cozy, sweet, yet earthy given those lovely pearl onions. Plus, it’s a one-sheet pan making clean up time minimal, which is always a selling point for me.

Cutting the butternut squash can be the biggest time-sucker, but I have good news. I have made this recipe with both frozen and fresh squash. So if you’re short on time, go for the frozen or even pre-cut squash in the produce section.

IMG_7107.JPG

If you do decide to go with the fresh squash, I highly recommend microwaving it for 5-10 minutes to soften the outer skin. Once cooled, peel the outer skin using a heavy duty vegetable peeler if possible then seed and cube into 1-inch pieces.

Cube the pears into 1-inch pieces and peel and half the pearl onions. I love the tart, but sweet flavor the apple cider vinegar adds. Feel free to use fresh or dried sage. This dish is delicious on its own or paired with chicken apple sausage.

IMG_7121Bonus! Butternut squash is a great source of vitamin A in the form of beta-carotene, potassium, vitamin E, vitamin B6, magnesium, fiber, and vitamin C. A great seasonal vegetable and immune booster in the winter.

Enjoy!

Pear, Butternut Squash, and Pearl Onion Bake

Author Elizabeth Weber

Ingredients

  • 2 Bartlett pears, cubed
  • 1 12 oz bag Pre-cut butternut squash (or 1 small whole butternut squash, peeled, seeded, and cubed)
  • 1 1/2 cups Pearl onions, peeled and halved
  • 2 tbsp Apple cider vinegar
  • 1 tsp Sage, dried
  • 1-2 tbsp Extra virgin olive oil
  • Salt and pepper to taste

Instructions

  1. Preheat oven to 400 degrees. Combine the pears, squash, and onions in a medium bowl.

  2. Toss vegetables with the olive oil, vinegar, sage, and salt and pepper. Spread the vegetable mixture on a lightly greased baking sheet.

  3. Roast for 25-30 minutes, flipping halfway through. Serve immediately.

-EAW

Posted on 1 Comment

Grapefruit, Avocado, Kale, and Parmesan Salad

Winter. I often find myself hibernating and only wanting to eat warm comfort foods. The problem is these comfort foods can really start to add up calorie-wise in the long run. Needless to say, I need to change it up sometimes and eat a little lighter. Enter citrus-based salads. They’re a go-to for a quick, healthy alternative to brighten up your winter menus.

Eating lighter isn’t always easy, particularly in the dead of a Michigan winter. Citrus and hearty greens are a great place to start. Since I started massaging kale (see arugula salad post for instructions), I’ve come to love using it in salads in the winter. Dark leafy greens are also a great source of iron, potassium, iron, vitamins A, C, K, and B6. Long story short, it’s jam-packed with nutritional benefits…often denoted as a “superfood”. Then there’s that creamy avocado – which is not far behind on the nutrition “superfood” totem pole. I have very sensitive, dry skin that takes some looking after when it’s cold and dry out. Therefore, I need muh healthy fats (monounsaturated to be exact) and avocado is my bitch.

The combination of the tartness of grapefruit, creamy avocado, and nutty Parmesan is a home run. Top with toasted pumpkin seeds or pair with chicken for an entree. Delicious.

Grapefruit, Avocado, Parmesan, and Kale Salad

Author Elizabeth Weber

Ingredients

  • 1 grapefruit, peeled and sliced
  • 1 pound kale, de-stemmed, washed, and cut into 1-2” bite-sized leaves
  • 2 avocados, pitted and sliced
  • 2-3 oz Parmesan cheese, shaved

Walnut Maple Dressing (adapted from keyingredient.com)

  • 1/2 cup pure maple syrup
  • 1/2 cup walnuts
  • 1/4 cup cider vinegar
  • 1 tsp kosher salt
  • 1/2 tsp white pepper
  • 1/8 tsp garlic powder
  • 4 Tbsp extra virgin olive oil
  • 1 tsp ground dry mustard

Instructions

  1. For the dressing, combine all ingredients except the oil in a food processor. Blend until well combined and walnuts are pureed. Pour olive oil in food processor (while running) in a slow steady stream through the feed tube. Add water as needed to thin the dressing to your desired consistency. Transfer to a jar or airtight container and refrigerate.

  2. Chop, wash, and allow kale to dry. Once dried, toss the kale with 1-2 tablespoons of the maple walnut dressing. Serve with the grapefruit, avocado, and Parmesan cheese.

*This salad can also be served with a balsamic vinaigrette or dressing of your choice.

-EAW

Posted on Leave a comment

Not-So Cheesy Dip

Super Bowl 2018 is tomorrow! I love watching a good football game, but who are we kidding, I’m all about the snacks. Super Bowl Sunday is the second biggest food consumption day behind Thanksgiving…yikes! So in my opinion, either you embrace it or hide in a dark hole somewhere. I’ll opt for the first option.

Don’t get me wrong. I love the little piggies in a blanket, wings, and copious amounts of dips. But I’m also a lover of trying to create spins on recipes to make them healthier…without sacrificing flavor.

I know what you’re thinking. Yeah, yeah, yeah. Just another dietitian showing up to the party with a “healthy” appetizer. But I kid you not, this not-so cheesy dip will leave you wanting more and gives you a nice antioxidant punch, providing you with a little extra energy to get through the whole game without dozing off. Still no promises over here (I do love my sleep).

The special ingredient to this dip is nutritional yeast. This is my first time using nutritional yeast in cooking and I foresee a lovely relationship blooming 🙂 Nutritional yeast provides a great cheesy flavor without all the saturated fat from full-fat cheese (and all the toots, am I right?).

Nutritional yeast is a nutrition powerhouse. It’s packed with protein, fiber, B vitamins, and folate. Plus, it’s low in calories (only 60 calories per 1/4 cup!), saturated fat, and sugar. The cheesy flavor hints provides a great substitute for all my dairy-free friends.

Between the vitamin A-packed butternut squash and B vitamin-loaded nutritional yeast, this dip passes the nutrition panel with flying colors. Lastly, this dip is seriously so easy to make. You can’t beat 7 ingredients (not counting the water, because well, it’s water) that you throw into a food processor. Voila!

Not-So Cheesy Dip

Course Appetizer
Servings 4 people
Author Elizabeth Weber

Ingredients

  • 1/2 Butternut squash, peeled, seeded and cubed I roasted a whole butternut squash
  • 1/4 cup Mexican cheese blend, shredded
  • 1/4 cup Nutritional yeast
  • 1 Chipotle pepper in adobe sauce, canned
  • 1/4 tsp. Salt
  • 1/4 tsp. Garlic powder
  • 6 tbsp. Water
  • 1-2 tbsp Extra virgin olive oil

Instructions

  1. Preheat the oven to 400 degrees. While the oven is heating, peel, seed, and cube the butternut squash. Lightly grease a baking sheet and spread the butternut squash evenly. Drizzle with the olive oil.

  2. Bake the butternut squash for 30 minutes flipping halfway through.

  3. Once the butternut squash is done, combine the squash, chipotle pepper, salt, garlic powder, cheese, nutritional yeast, and water in a food processor. Blend until smooth. Add additional water until desired consistency. 

  4. Serve immediately with tortilla chips or refrigerate for later use. 

Recipe Notes

This recipe is for about 4 people (makes 1 1/4 cups), but if you are having a larger get-together, using the whole butternut squash and doubling the other ingredients will work for closer to 8 people. 

Happy noshing!

-EAW

Posted on 2 Comments

Matcha Green Tea Energy Balls

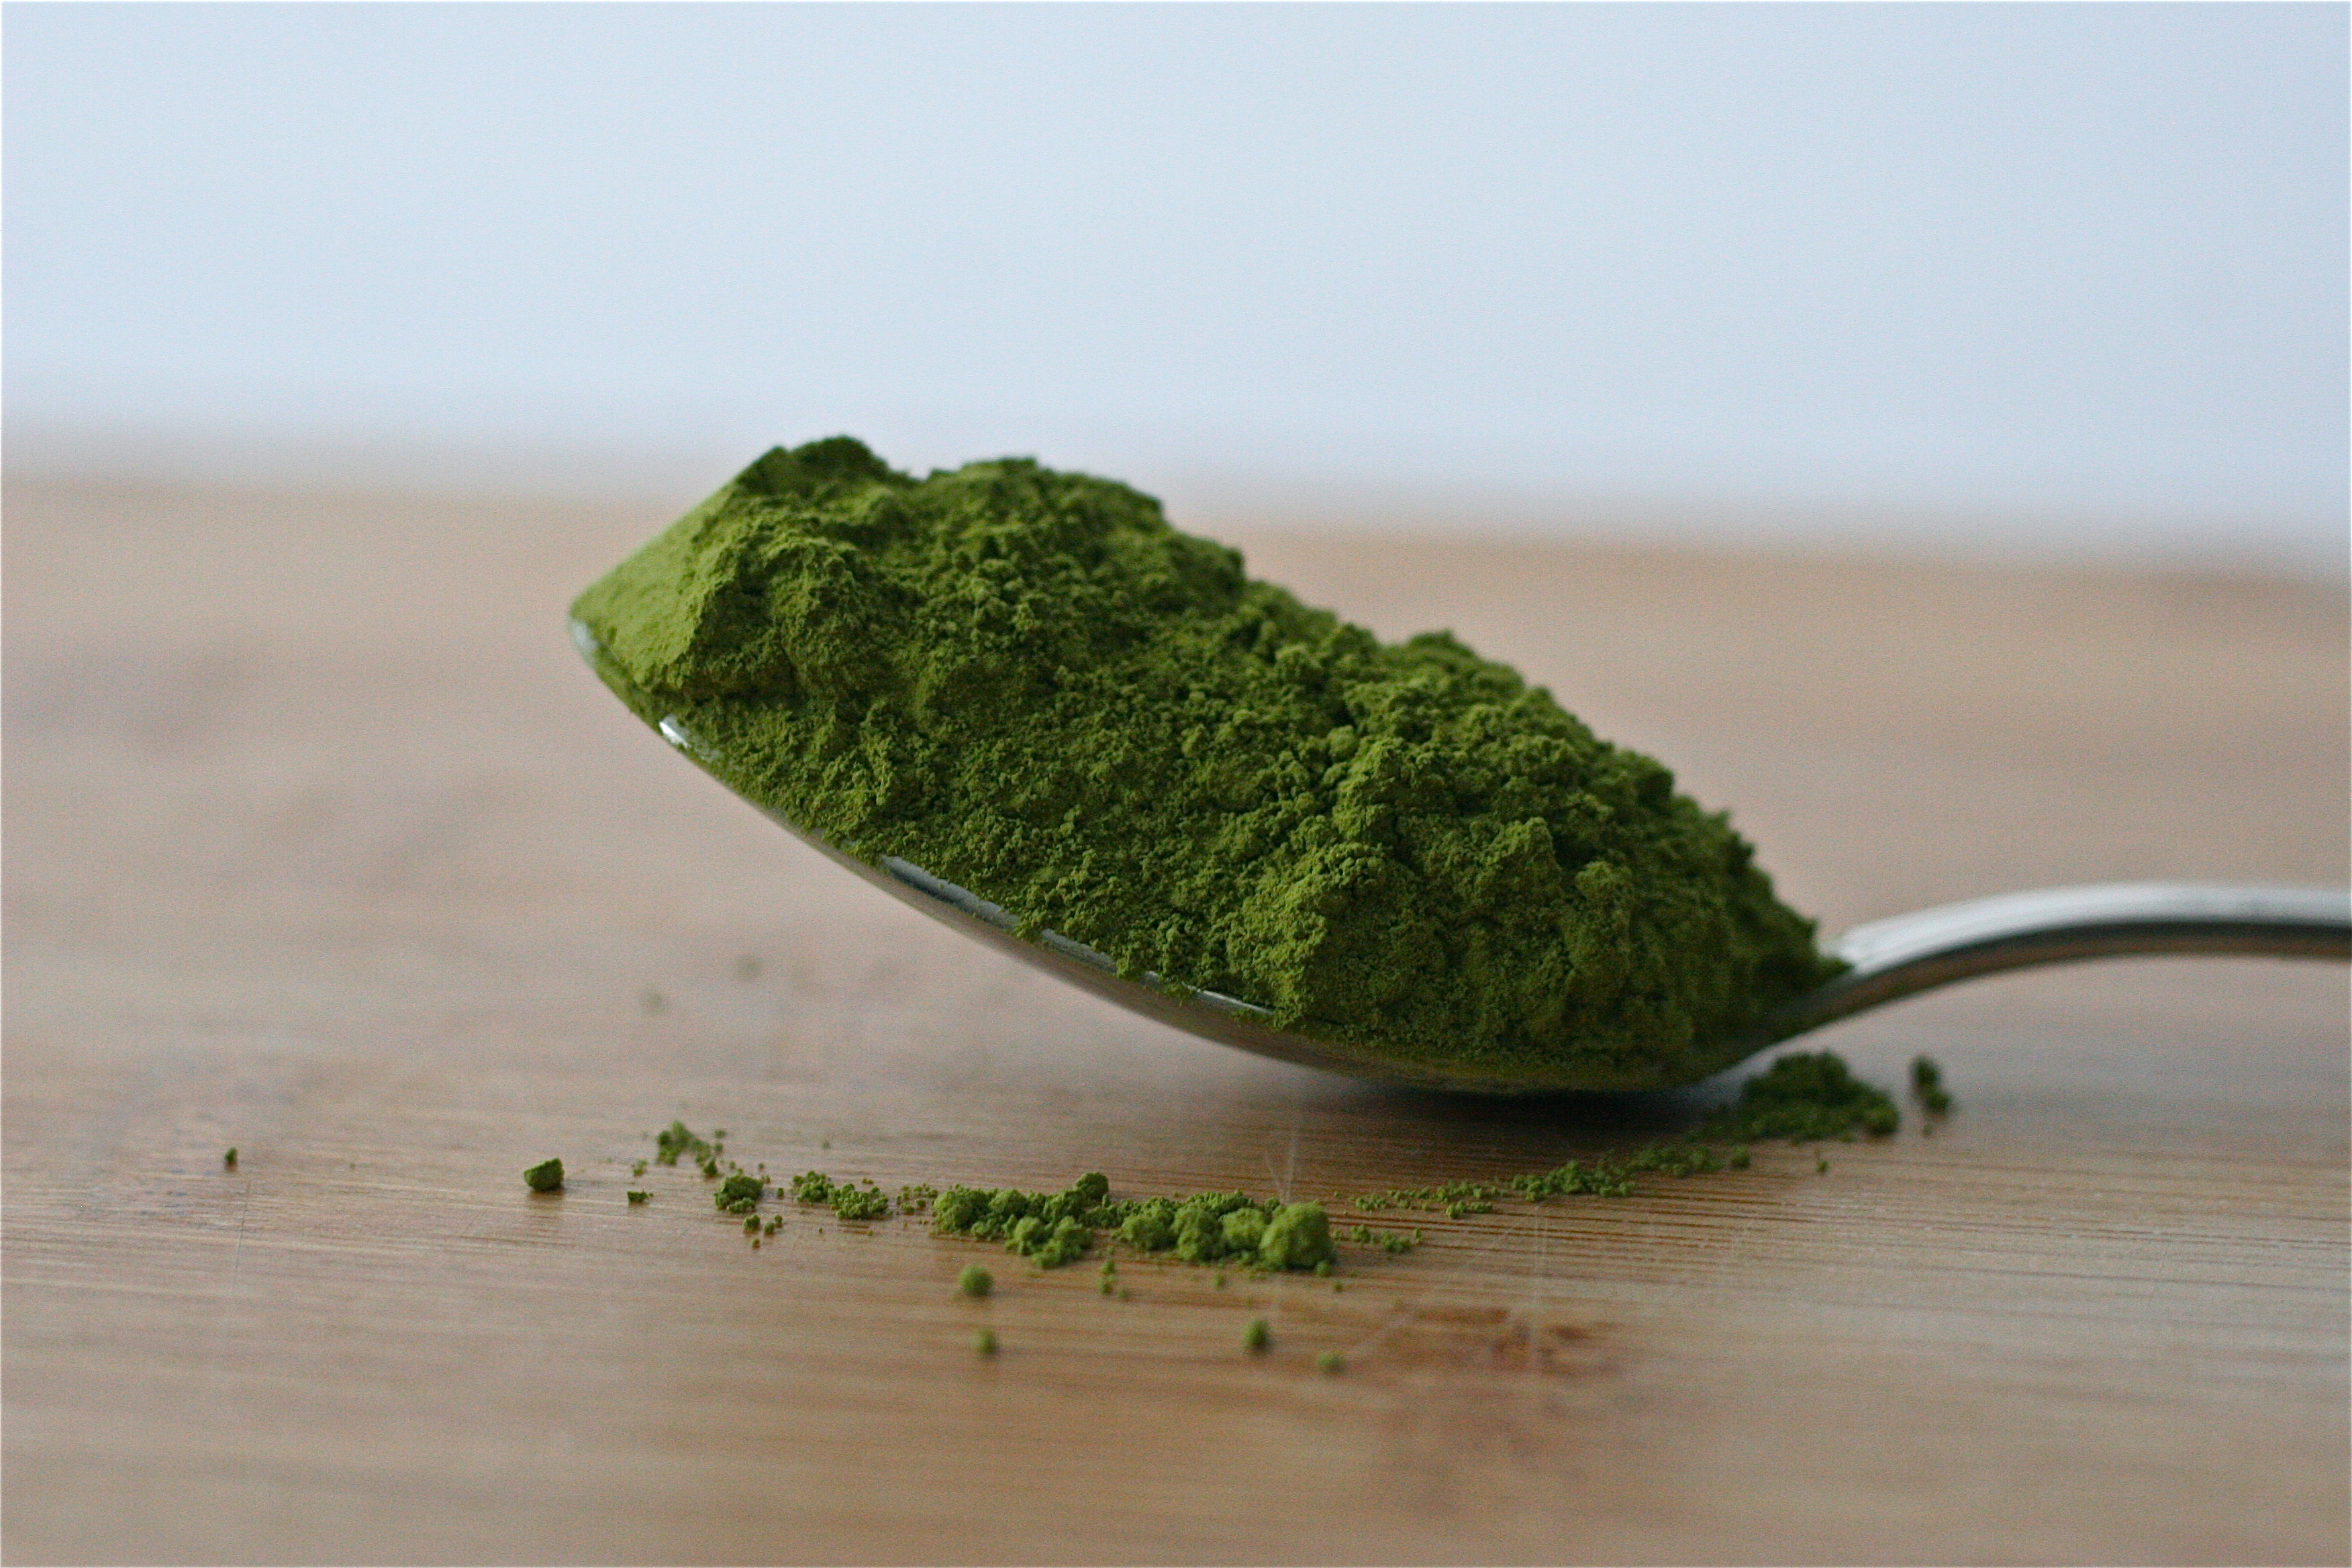
Matcha green tea powder is quite popular for its antioxidant powder that is potentially greater than regular bagged green tea.

IMG_7028

Why you might ask?

Matcha green tea is slightly different from traditional green tea in a few ways.

Consumption:

Matcha green tea is the whole tea leaf ground into a powder. This powder is then mixed in with hot water for a frothy tea beverage, ultimately allowing you to consume whole tea leaves. On the other hand, general consumption of regular green tea is the infused water from the leaves instead of whole tea leaf consumption.

Growth:

About six weeks prior to harvest time, matcha green tea leaves are shaded to help reduce sunlight and photosynthesis. As a result, the chlorophyll and amino acid content is intensified, which helps contribute to its umami flavor profile and wonderful antioxidant power. High quality matcha is grown in near darkness prior to harvest.

Health Benefits:

Matcha green tea also contains l-theanine and epigallocatechin gallate (EGCG), which have antioxidant properties, help fight inflammation in the body, and may improve alertness. Due to lack of scientific evidence specific to matcha green tea, there is no clear indication to drink matcha green tea over regular green tea. However, due to the fact that really good quality matcha creates an amazingly frothy, creamy latte AND has potential to repair the damage I do to my body on the weekends, I’m sold. Try using in lattes, smoothies, and sweet or savory sauces. It is not recommended to drink more than 2 cups of matcha green tea daily due to its nutrient concentration.

Now let’s get to the recipe!

These matcha green tea balls are a great snack to hold you over between meals, give you a boost before or after a workout, or as a healthy dessert after dinner. I made these babies for my coworkers as a holiday gift because I’ve got “matcha” love for my team 🙂 Hope you enjoy!

Matcha Green Tea Energy Balls

Course Dessert, Snack
Total Time 45 minutes
Servings 48 balls
Author Elizabeth Weber

Ingredients

  • 1 cup sliced almonds
  • 1/2 cup old-fashioned oats
  • 1/2 cup unsweetened cocoa powder
  • 1 cup medjool dates, pitted and chopped
  • 2 tsp vanilla extract
  • 2 tsp pure maple syrup
  • 1/4 cup unsweetened soy milk (or other non-dairy milk of your choice)
  • 1/2 cup semi-sweet mini chocolate chips
  • 1/4 cup matcha green tea powder

Instructions

  1. Pit and chop the dates. Place matcha powder in a medium-sized mixing bowl and set aside.

  2. Combine the almonds, oats, and cocoa powder in a food processor and pulse until evenly distributed.

  3. Add the dates, vanilla extract, maple syrup, and 1/8 cup of the soy milk. Pulse until the mixture is formed. After adding the first 1/8 cup of soy milk, add 1 tsp of soy milk at a time until the mixture is moist enough to roll, but not too wet where it is constantly sticking to your hands.

  4. Roll the dough into ~1 inch size balls and place in the mixing bowl with the matcha green tea powder.

  5. Shake the bowl to coat the balls with the powder. Serve immediately or refrigerate/freeze for later use.


-EAW


Posted on 2 Comments

The Ketogenic Diet and Cancer

The ketogenic diet has been all the rage in the media lately as a potential weight loss diet or as a strategy to reduce cancer cell growth, but is it really safe or evidence-based? I’m about to nerd out with you, buckle up.

Follow my audio guide on WZZM here.

What is the ketogenic diet?

The ketogenic diet (KD) is a high fat, moderate protein, and low carbohydrate diet. Americans generally consume a diet high in carbohydrates (50-75%). The KD diet requires careful calculation to ensure the ratio of fat to protein/carbohydrates is 4:1. When this ratio is achieved, metabolic pathways shift the bodies’ use of glucose as its primary source of energy to fat or ketones (metabolites of fatty acid breakdown). During this process called ketosis, the body starts to metabolize ketones to provide fuel for bodily functions. Examples of high carbohydrate foods that are limited on this diet include sweets, bread, pasta, juice, fruit, and starchy vegetables. Examples of high fat foods that would be included in this diet may be avocado, olive oil, nuts, nut butters, heavy cream, and butter.

This diet has classically been used to treat epilepsy in children and most recently in adults. In regards to cancer, the ketogenic diet has been of particular interest in the treatment of brain tumors, such as glioblastoma multiforme (GBM). However, there has also been interest in its overall treatment of any cancer. Because the brain and cancer cell’s preferred fuel source is glucose, the theory is the KD may alter the metabolism and reduce growth of brain tumor cells and possibly make it more sensitive to treatment (chemotherapy and radiation).

IMG_7016

What we currently know

  • The use of the KD diet is safe and feasible as an adjuvant therapy, but requires frequent lab testing and supervision by a dietitian and physician.
  • The KD diet should be administered over at least 3-4 weeks to see any potential benefit or improvement.
  • Quality of life and current tolerance to cancer treatment should be taken into consideration before starting this diet. If a patient is already having difficulty maintaining their weight or sustaining nutritionally, the ketogenic diet may only exacerbate cancer cachexia and an individuals ability to tolerate treatment. A patient’s safety should always be priority numero uno.
  • Animal-based studies and some human studies have shown promising, yet inconsistent results in reduction of tumor growth with the ketogenic diet, especially with brain cancers.

Questions that still need answering-

  • Does every type and subtype of cancer respond the same way to the KD diet? It’s important to remember that not all cells in the body respond the same way and same goes for cancer cells.
  • What’s the exact dosage or ketogenic diet regimen that is most effective? For example, what exact ratio of fat to carbohydrate will be most successful in reducing tumor growth?
  • What are the specific markers or signals that indicate the ketogenic diet is working as it pertains to cancer? In the case of epilepsy, effectiveness can be seen by a patient not having seizures as a result of successful ketosis, however this would be more difficult in cancer. It may require more frequent CT scans and imaging to check on the growth or lack thereof of tumors as a response to the ketogenic diet. With insurance companies already getting a little iffy with providing coverage for reimaging, this may be a challenge.

IMG_7011.JPG

Other things to consider-

  • Side effects: constipation, fogginess, lightheadedness, and fatigue
  • Better research is needed:
    • Gold standard: Double-blinded, randomized controlled clinical trials
    • Studies specific to cancer type and subtype
  • Good news! Currently, there are several clinical trials and studies ongoing to help address the questions requiring answers.

Takeaway: As an oncology dietitian, I am very excited about the potential of the ketogenic diet being used as a measurable medical nutrition therapy in cancer treatment. But just like any prescription drug or chemo treatment, this needs to have substantial supporting evidence and testing to ensure the treatment is safe and effective. More to come on this topic. Stay tuned…

-EAW