
Posted on Leave a comment

3 Healthy Ways to Survive Wedding Season

There’s nothing better than celebrating the love between two people you care about. It always brings so much joy and I always feel so grateful that those two individuals want me there to celebrate with them. What I DON’T love is the unnecessary stress I sometimes feel leading up to, during, and after a wedding.

“Did I eat enough to hold me over?”

“Did I eat too much?”

Or “I should not have ate that!”

None of these lead to a positive or healthy experience.

With a healthy lifestyle, we should be able to bob and weave. Meaning life is going to throw us curveballs and we need to equip ourselves with the skills to adjust as needed while maintaining our physical and mental health. It’s a fine line. Sometimes what makes my heart happy, doesn’t always equate to optimal food choices. Sometimes I like a good ole’ bowl of regular cookie dough ice cream, but that doesn’t always make my waistline happy. Finding the balance between both is what living a healthy lifestyle means and that is different for every single person.

Wedding photo 2

These are 3 tips that I have found helpful during wedding season, but you may need to tweak as needed to fit your lifestyle and that’s perfectly fine!

1. Don’t skip meals. I know, I know. You think it’s necessary to skip breakfast or lunch leading up to a big event where you’re likely to consume more calories than your normal dinner. However, skipping meals will only lead to binging and overeating. In addition, your body’s metabolism slows down when you skip meals and rob it of the essential nutrients it needs for daily activities, especially when you skip breakfast.

2. Bring a snack. The anxiety that starts to creep in if you don’t see food for a couple hours…oh wait, that’s just me? Oh well. But seriously, if you’re worried about how long it might be before you eat dinner, pack a snack, such as a granola bar or ziplock of mixed nuts, to hold you over. There’s no shame in knowing your body…only you can know what it needs! Plus it’s always good to be prepared when your Chardonnay-sloshed body needs that snack after hitting the dance floor all night.

3. Eat the cake. Those who avoid, obsess. Girl, if you want to eat the cake, eat the damn cake! Trying to avoid it will only lead to the cake being on your mind for far too long. This extra time spent perseverating about whether you should eat the cake or not would be better spent dancing the night away with your significant other or catching up with old friends that you haven’t seen in eons.

BissellWedding-713
Yep, that’s me…eating cake because it’s damn delicious!

Although this isn’t included in the 3 tips, the last takeaway is just to move on the next day. Relish in the fact that you had a great time! Remind yourself that when Monday rolls around, you are headed back into your healthy lifestyle again, or maybe not, maybe that’s for Tuesday. Either way is A-OK! Living a healthy lifestyle is a give and take.

-EAB
Posted on 1 Comment

No Added Sugar Currant Jam

Sugar. The poor word gets such a bad rap. And often for good reason. It is in a lot of our foods…I mean A LOT. The food industry does not help us along the way either. At times, they make it very difficult for the average person to understand whether a food is high or low in added or natural sugar. They also tend to sneak it in wherever they can, especially condiments.

The easiest way to become more comfortable with understanding what is added and what is natural sugar is by looking at the ingredient list. The most common added sugars are high fructose corn syrup, raw sugar, honey, fruit juice concentrates, syrups, or molasses.

IMG_7406.jpg

Naturally occurring sugars generally come from lactose in dairy foods and fructose, which is naturally occurring in fruit. Foods high in added sugars often come from sweetened beverages, condiments, desserts, and baked goods. 

One of the main reasons you want to keep your added sugar intake in check is the amount of calories in 1 gram. With 1 gram of sugar containing 4 calories, the calories from high-sugar food items can add up quickly if you’re not careful. If you consume sugar in large quantities, the excess calories can result in weight gain. Excess weight in the form of overweight or obesity can lead to a multitude of chronic diseases and conditions, such as heart disease, diabetes, or stroke.

So what’s the limit for added sugar intake per day? The American Heart Association recommends ~6 teaspoons or less (25 grams) of added sugar daily for women and ~9 teaspoons for men (36 grams). If you’ve ever kept an eye on your sugar intake throughout the day, you know this target can be very difficult for some us, especially my fellow sweet tooth lovers. To put this into a little perspective, a standard 12-oz soda has around 39 grams of added sugar. This equates to around 9 teaspoons and close to 160 empty calories just from the sugar. See what I mean? This shit adds up!

IMG_7434

So what do we do with this information? Well I have some really great news for you. Fruit is a natural sugar and it is sweet! Getting creative with how you use certain fruits can lead to healthier choices and overall reducing your added sugar intake. Now keep in mind, fruit is still a sugar, a natural sugar, but nonetheless a sugar. However, the pros of eating fruit over other high sugar food items, such as cookies, cakes, or soda, greatly outweigh the cons of potentially eating too much fruit, which is highly unlikely in our westernized eating habits.

IMG_7435

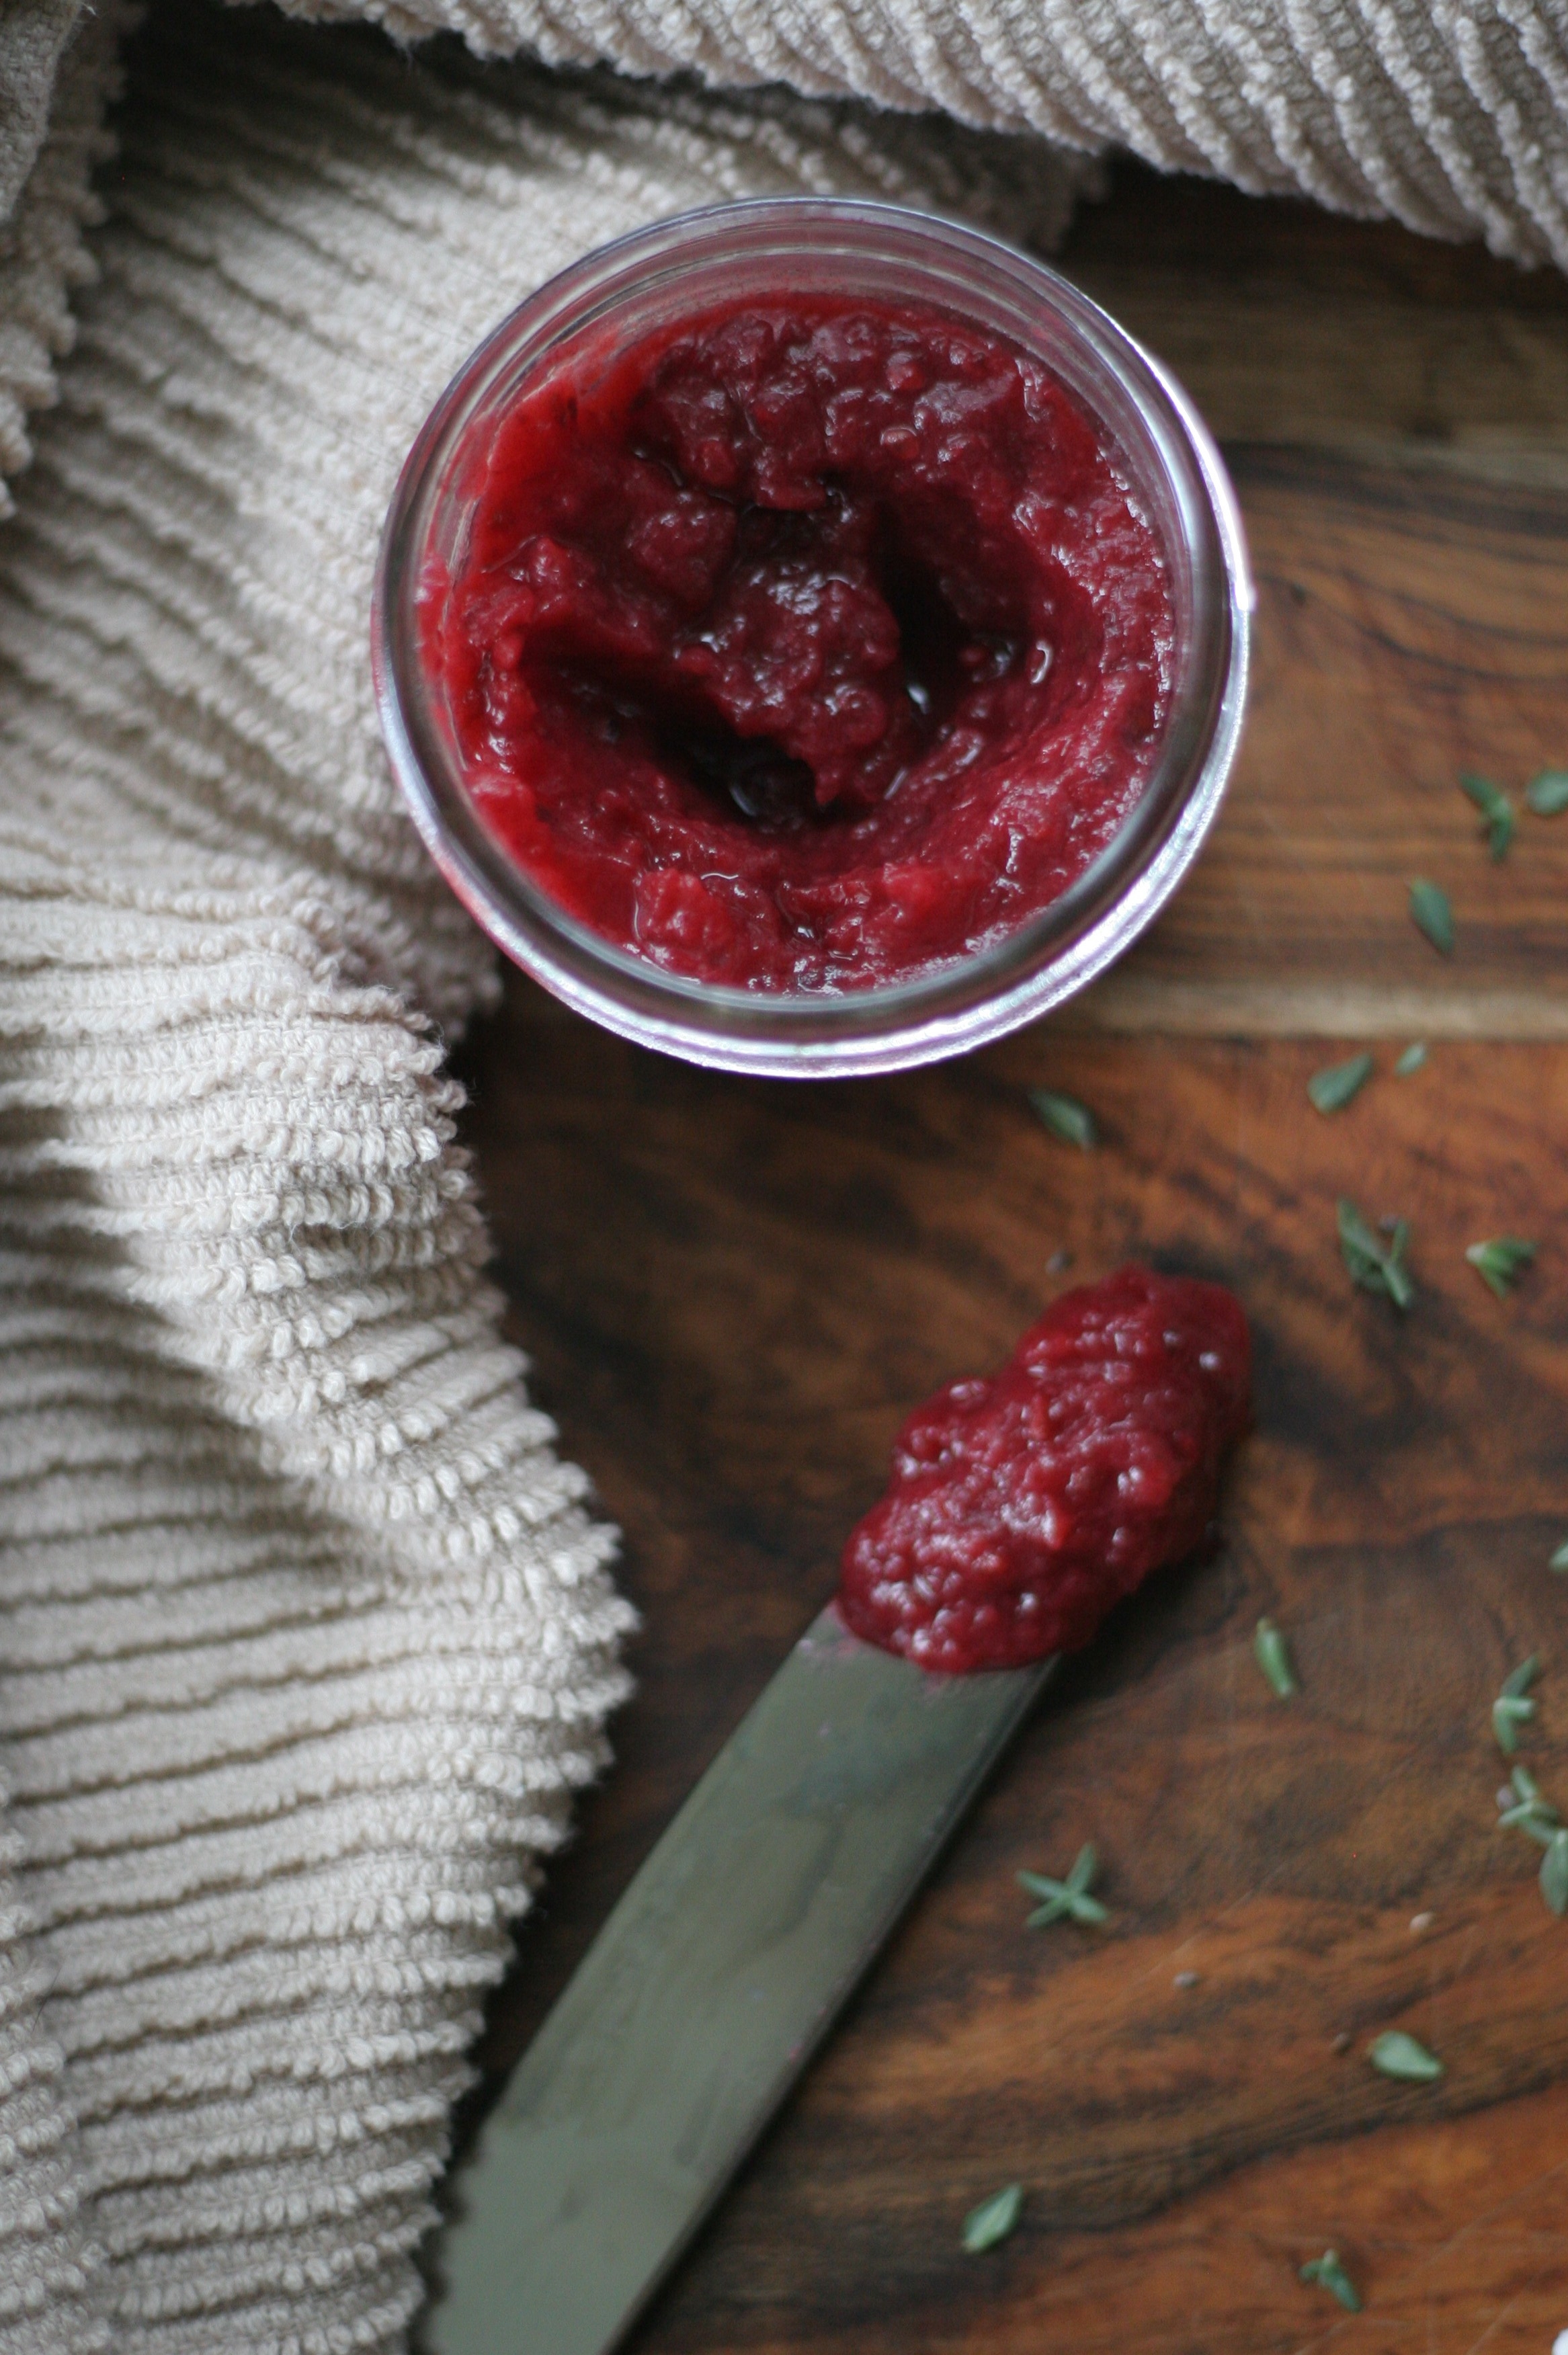
This three-ingredient currant jam is so easy (hence only three ingredients!) and is naturally sweetened using dates. The red currants offer a fresh tartness that compliments the sweetness from the dates beautifully.

Another bonus, both dates and currants are jam-packed with vitamins and minerals, such as vitamin C, vitamin A, dietary fiber, iron, and potassium. Dates also contain tannins, which have great antioxidant and anti-infective characteristics.

Enjoy this nutrient-dense jam without the guilt of any added sugar. Spread on whole grain toast with avocado chunks, goat cheese, chia seeds, and fresh thyme for a healthy snack or serve with pork loin for a hint of sweetness in an otherwise savory dish. -EAB

IMG_7438

No Added Sugar Currant Jam

Course Breakfast, Snack
Servings 1 small mason jar
Author Liz Bissell

Ingredients

  • 1 cup red currants
  • 5 dates, pitted and roughly chopped
  • ¼ cup water

Instructions

  1. Pit and chop the dates.

  2. Add the currants, dates, and water to a small saucepan. Bring to medium heat and simmer until the currants become gelatinase, about 3-5 minutes.

  3. Pour the date-currant mixture into a food processor and blend for about 1-2 minutes until smooth and evenly combined. Store in a mason jar in the refrigerator until ready for use.

Posted on Leave a comment

Monday Morning Detox Smoothie

Woof. How does that alarm come around so soon? It’s Monday morning. You’ve had a wonderful weekend with friends and family but with the ever-so-subtle pounding in your head reminds you that maybe you had a little too much fun. We’ve all been guilty of it. There are weekends I eat well, exercise, and go to bed at 9pm. And then there are other weekends where family or friends are visiting, weddings are celebrated, and long nights grilling on the back patio transpire. That’s just life. The healthy lifestyle ebbs and flows.

But after those not-so-healthy weekends, I find myself come Monday morning wanting some type of a reset button with my diet. Something to jump start my Monday on a positive note. This detox smoothie is my go-to! Now all my fellow dietitians don’t get your panties in a bundle. This smoothie will not completely erase or “detox” your body of all the harmful things you did to it over the weekend (that’s what your liver is for!), but the smoothie does have some serious antioxidant power that will help start your diet back on the right foot for the week.

Studies suggest that turmeric, in particular the active ingredient curcumin found in turmeric, has many antioxidant and anti-inflammatory properties. However, the absorption of curcumin is not always the best when consumed alone. Research has found that piperine, the active ingredient in black pepper (also found in chili powder and cayenne pepper), can significantly increase the absorption of curcumin in the body when consumed together. As a result, the health benefits of curcumin are enhanced when taken in combination with black pepper.

Turmeric

I know what you’re thinking. Black pepper and turmeric in a smoothie? Does that even taste good? I’m here to tell you it does. The black pepper is nearly untraceable in the flavor of the smoothie. And trust me the antioxidant and anti-inflammatory power house that this smoothie packs is well worth trying the recipe.

Detox smoothie 2

This smoothie aids in getting my digestive system back on track, helps tame some of the inflammation caused from my weekend activities, and gives me a great boost of energy on a Monday morning, which who are we kidding, we all could use 😉 Enjoy!

-EAB

Monday Morning Detox Smoothie

Course Breakfast, Snack
Prep Time 10 minutes
Servings 1 smoothie

Ingredients

  • ½ tbsp pickled ginger (fresh works well too)
  • 1 handful fresh spinach (frozen can also work)
  • ½ frozen banana
  • ¼ tsp turmeric
  • 1 tbsp chia seeds
  • ¼ avocado
  • juice of ½ lemon
  • pinch of ground black pepper
  • 1 cup unsweetened soy milk (or milk of choice)

Instructions

  1. Blend all the ingredients until smooth. Add more/less milk to your desired consistency.

Posted on 2 Comments

Thai Burgers with Sriracha Mayo

Happy Friday! It’s a great day to add a little flavor to your life!

If you haven’t noticed, I love taking traditional recipes and spicing it up with different flavor profiles or ingredients. Often this is because I’m trying to use up leftovers or extra produce in the refrigerator. Truthfully, this is one of my favorite pastimes…fridge wide open (fridge beeping at me because I’ve held the doors open too long) trying to decipher how I can get certain flavors to marry. Now I’m certainly not ready for the show Chopped because this process can take me 20 minutes just to come up with an idea, but hey, I do love a good challenge when it comes to using ingredients. Thai burgers

These burgers are a result of this. I had some peppers from the garden, cilantro bunch that needed to be used up, and extra limes and red onion. Plus, my husband always likes a good homemade burger. Who doesn’t?! I personally don’t always like the premade burgers from the grocery store due to the additives and salt content. I’m all in favor of creating what flavors I want to have in my own burger. And it really does not take that much extra time to create your own at home. Trust me 🙂

Thai burgers 3

I used Dakota 85% lean grass-fed ground beef for this recipe and wouldn’t go any leaner. If you go leaner, the burgers will need some type of a binder to help keep them together. I try to be as health conscious as possible when it comes to choosing meat to avoid any extra additives, hormones, or preservatives. This company seemed to be right up this alley…family-owned company, non-GMO, grass-fed, and no added hormones. Now, does this happen all the time? No, that’s just not realistic. A healthy lifestyle is a balance remember? Truthfully, my local grocery store seems to always change up their meats and I try to keep an eye out for new, healthier options.

This recipe is an easy 30-minute aka perfect for a Friday night dinner (HINT, HINT it’s Friday!). The freshness from the cilantro and veggie-packed burger patty mixed with the kick from the sriracha mayo make these burgers so addicting. A real crowd-pleaser if ya know what I mean 😉

I used a cast iron skillet to pan-fry these patties only because I was afraid they would fall apart on the grill. If you are using a little fattier meat and feel like your patties can stand on their own two feet, then go for it! Enjoy! -EAB

Thai burgers 2

Thai Burgers with Sriracha Mayo

Course Main Course
Servings 4 servings
Author Liz Bissell

Ingredients

Burgers

  • 1 lb 100% organic grass-fed ground beef (85% lean)
  • 3 cloves garlic, minced
  • 2 small bell peppers (or 1 large)
  • ¼ red onion, chopped
  • cup fresh cilantro, chopped
  • juice of ½ lime
  • 1 tbsp fish sauce
  • ¼ tsp sea salt
  • ¼ tsp ground black pepper

Sriracha Mayo

  • ½ cup olive oil mayonnaise
  • 1 tbsp sriracha sauce
  • juice of ¼ lime

Instructions

  1. Stir together the mayo, sriracha, and lime juice and refrigerate until burgers are ready.

  2. Add the beef, garlic, peppers, red onion, cilantro, lime juice, fish sauce, and salt and pepper to a medium bowl. With your hands, mix the beef mixture to evenly distribute the vegetables and seasonings. Form four beef patties.

  3. Coat a cast iron skillet with cooking spray and bring to medium-high heat. Once the pan is hot, add the burgers. Cook on medium-high heat for 4-5 minutes on each side.

  4. Serve with sriracha mayo on hamburger buns of choice and garnish with extra cilantro and a lime wedge.

Posted on Leave a comment

Healthy Tzatziki Sauce

I have been obsessed with making sauces or aioli’s lately to bring an average dish to the next level. In college, one of my girlfriends did a study abroad in Greece for the summer. She came back bragging about this amazing cucumber-dill sauce that she ate constantly over there. When she made the tzatziki sauce for us, I COULD NOT stop eating it. We ripped off pieces of French bread and dipped it into this thick, creamy goodness…over and over and over again.  Tzatziki sauce

Although I woke up the next morning breathing fire from the garlic (despite brushing my teeth thoroughly the night before), it was so worth it! Since then, I have made this sauce several times and it is a must-make in the summer, especially with the abundance of cucumbers I have growing in my garden. This sauce pairs beautifully with anything Greek (for obvious reasons), such as a Greek salad, gyros, or just plain old baked chicken breast.

Tzatziki sauce 1

This sauce also makes for a great high-protein, low calorie dip served with vegetables and crackers…perfect for football season right around the corner! The high protein content of the Greek yogurt will help you feel full for longer and keep your grazing in check. This sauce can be made a few minutes before serving but it truly tastes the best if it has had at least an hour or even overnight to let the flavors marinade. The key to avoiding this tzatziki sauce from getting too watery is salting the chopped cucumbers and letting them sit for an hour or two. This extra step pulls water from the cucumbers making the sauce extra creamy instead of watery.

Print this recipe off because you’re going to want to add it to your regular rotation 😉 Enjoy!

Tzatziki Sauce

Course Appetizer
Servings 2 cups
Author Liz Bissell

Ingredients

  • cups plain non-fat Greek yogurt
  • 1 large cucumber, peeled, seeded, and chopped
  • juice of 1 lemon
  • cup fresh dill, chopped
  • 4 cloves garlic, minced
  • ¼ tsp sea salt, coarse More as needed to salt the cucumber.
  • ¼ tsp ground black pepper

Instructions

  1. Peel cucumber and slice lengthwise. Using a spoon, scrape the all the seeds of the cucumbers out. Then chop the cucumber.

  2. Cover a baking sheet with paper towel. Spread the cucumber over the paper towel. Sprinkle the cucumber with sea salt and set aside. Allow this to rest for 1-2 hours.

  3. While the cucumber is resting, combine the Greek yogurt, dill, lemon juice, garlic, salt and pepper in a medium size bowl. Cover and refrigerate until cucumbers are ready.

  4. Once the cucumbers are ready, add into the yogurt mixture and stir to combine. Serve immediately or refrigerate. Best if refrigerated for at least an hour before serving.

-EAB

Posted on 1 Comment

Easy Summer Arugula Salad

Easy Summer Arugula Salad

Course Main Course, Salad, Side Dish
Author Liz Bissell

Ingredients

Salad mixture

  • 2 green onions, chopped
  • 1 zucchini, sliced and quartered
  • 1 cucumber, sliced and quartered
  • 1-2 handfuls fresh arugula
  • 1 cup cherry tomatoes, quartered
  • 1 handful fresh parsley, finely chopped
  • 1 handful fresh basil, finely chopped
  • 1 avocado, cubed
  • 1 oz goat cheese

Salad Dressing

  • 1 tbsp white wine vinegar
  • 2 tbsp extra virgin olive oil
  • juice of 1 lemon
  • Sea salt and ground pepper to taste

Instructions

  1. Add the green onions, zucchini, cucumber, cherry tomatoes, and arugula in a large mixing bowl. Stir to combine.

  2. In a small bowl, whisk together the olive oil, lemon juice, vinegar, and salt and pepper. Drizzle over the salad and toss to combine.

  3. Add the basil, parsley, avocado, and goat cheese. Toss one last time. Serve with your favorite protein if desired.

Recipe Notes

This salad makes a great side dish for four people or add your favorite protein for an entrée salad for two. 

If this salad will be consumed over a couple days, I would avoid adding the avocado to the whole bowl and instead, slice up and add to salad on a daily basis to keep the avocado as fresh as possible.

Posted on 3 Comments

Peach, Blueberry, & Lavender Crumble

Summer in Michigan is the best time of the year for fresh produce. The fresh blueberries, raspberries, sweet corn, tomatoes, peaches, and herbs! Oh the bountiful herbs! My garden is booming and so are the farmer’s markets. I’m a happy camper. Nothing…I mean NOTHING beats Michigan blueberries in the summer. The flavor is so sweet and tart that I find myself eating them by the handful. The flavor is a world different than blueberries from the grocery store in the winter. So I have been trying to use them as much as possible in my cooking.

Blueberries

Now I’m not a baker. Let me repeat myself. I loathe baking. You end up with a shit ton of dishes, the precision of measuring makes me crazy, it generally seems to take a lot of time. To all those who love and are good at baking, I applaud you. Truly, I WISH I enjoyed baking. Sometimes if I’m really wanting to impress my husband, I’ll bake a cookie skillet or pumpkin muffins in the fall. But considering we’ve been together for over four years now, these moments are less frequent (sorry honey!).  

IMG_7271

When I do make an attempt at baking, it’s usually a pretty easy recipe or some type of a deconstructed baking process that’s less difficult. Which leads me to this berry, peach, lavender crumble. It’s a baking recipe I created for all those in favor of making baking as easy as possible, in addition to anyone who’s as in love with local, fresh produce as I am. I’m always inclined in the summer to step out of my comfort zone with new herbs or flavors that inspire me. I’ve had wild lavender growing in the field of my backyard for quite some time now. I’ve awed at it for years from my back patio and that’s where its ended. I never really knew just what to do with it.

This year I’ve committed myself to harvesting it and using it in my cooking. Since I’ve begun this quest, I’ve found that if used in the right amount, lavender can add a wonderfully subtle floral hint to a recipe, whether that be sweet or savory and trust me, it can definitely be used in both types of flavor profiles.

Now let’s make one thing clear here before moving on. The lavender I have growing is wild lavender, therefore not treated with pesticides. If you want to use lavender in your cooking, you’ll need to grow it wild, find a local lavender farm, or order culinary lavender online. With that being said, this recipe is still delicious if you decide to omit the lavender.

Crumble-ingredients in a bowl

Some of the ingredients in this recipe can easily be substituted for other items that you may have in your pantry instead (i.e. regular sugar instead of coconut palm sugar or regular all-purpose flour instead of gluten-free all-purpose baking flour). I try to keep my ingredients as plant-based as possible, which is why I sometimes explore other types of sweeteners or flours. In addition, my husband is quite allergy-prone so I have to be careful with my ingredients. However, this is not to say that using regular all-purpose flour or sugar are any more/less healthy than the ingredients I use (that’s a conversation for another day ;).

Crumble-cast iron

Here is what I do know about this recipe, it’s very doable for beginners in the kitchen (or fellow non-bakers like myself). Plus, it provides some serious health benefits. The blueberries and peaches pack an antioxidant-punch like no other and provide a great source of potassium, beta-carotene, vitamin C, and fiber. Not to mention, they’re in-season and just plain delicious.

I used a 9-inch cast iron skillet, but you could also use individual muffin tins or soufflé ramekins. The sweetness of this dessert will remind you of why you love everything Michigan summer but the spice blend will leave you craving fall. It’s a perfect end of August, almost September recipe.

Crumble-final with ice cream 3

Serve warm with a scoop of vanilla ice cream (I used So Delicious coconut milk vanilla bean) and extra lavender for garnish. This crumble also reheats nicely for a mid-afternoon snack 😉

Crumble-final with ice cream 2

Peach, Blueberry & Lavender Crumble

Course Dessert
Prep Time 25 minutes
Cook Time 1 hour
Total Time 1 hour 25 minutes
Author NoshinDietitian

Ingredients

Peach-Berry Mixture

  • 3 peaches, cubed
  • 2 cups blueberries
  • 1 tbsp fresh lavender
  • 1/4 cup all-purpose gluten-free baking powder
  • 2 tbsp organic coconut palm sugar
  • 1 tsp cinnamon
  • 1/8 tsp cloves
  • 1/8 tsp cardamom
  • 1 tbsp organic agave nectar

Crumble

  • 3/4 cup old-fashioned rolled oats
  • 1/4 cup pecans, roughly chopped
  • 1/8 tsp sea salt
  • 2 tbsp all-purpose gluten-free baking powder
  • 1 1/2 tsp organic agave nectar
  • 1 tbsp refined coconut oil, melted

Instructions

  1. Preheat oven to 350 degrees. Spray the cast iron with cooking spray. Cube the peaches and set aside.

  2. Add the flour, sugar, cinnamon, cloves, and cardamom to a medium mixing bowl and stir to evenly combine. Add the blueberries, peaches, and agave nectar to the bowl. Stir until all the fruit is coated. Spread the fruit mixture evenly across the bottom of the cast iron.

  3. In a separate smaller bowl, combine the oats, pecans, salt, flour, agave nectar, and coconut oil. Spread the crumble over top of the fruit mixture.

  4. Bake for 55 minutes to an hour until the crumble is golden brown. Serve with ice cream.

Recipe Notes

  • For the coconut palm sugar, I used Wholesome organic palm sugar.
  • For the flour, I used Bob's Red Mill gluten-free all-purpose baking flour.

Enjoy!

-EAB

Posted on Leave a comment

3 ways to reduce post-vacation anxiety

It’s a Sunday night, you’re sun-kissed from vacation, and have just landed at Gerald R. Ford Grand Rapids airport. You’re waiting at baggage claim and as you wait for the carousel to beep and start circling, a creeping anxiety starts to build in your mind then your thoughts start to overwhelm. “What kind of food do I have in the fridge at home? What am I going to eat this week for lunch? Oh no, the gym. Are my pants feeling a little tight? Why didn’t I workout more while I was on vacation? I shouldn’t have drank all those piña coladas!”

Stress

We all know the feeling. The post-vacation, Sunday scaries. They often seem unavoidable, especially after a long, gluttonous vacation. I recently came back from a nice trip to Florida and these exact thoughts started swarming my mind. Before allowing my heart to start racing with anxiety, I took a deep breath and remembered why I went on this vacation in the first place…reset my mindset. Although these negative thoughts started rushing in, I was able to cut the thoughts at their roots before they had a chance to start growing into an actual thought process that wouldn’t lead to anything productive.

Often in the past I’d go into the work week working out harder and longer to try and make up for the lack of time I had spent in the gym on my vacation, cut back on my portion sizes, or eat a ton of salads for lunch and/or dinner to try and bounce back. Although my heart was in the right place, this type of behavior did not lead to anything healthy, whether that be mental health, physical fitness, or weight goals. dumbbells.jpg

It generally led to obsessive thoughts about food and my body, overeating due to restraining myself, and overall exhaustion from not meeting my “goals” for the week. Over the last few years, I’ve finally been able to ease back into my normal, healthy lifestyle by doing just three simple things.

  1. Ease yourself back into your routine organically. Do what feels right. For example, skipping the gym a few more days than normal or going on a walk instead of a run to allow your body to adapt to being back on a structured routine (both work and fitness-wise) is A-OK. Going out to eat or happy hour even though you know you don’t need those extra calories post-vacation. Skipping the salad at lunch and eating a sandwich instead because you’re feeling really hungry. These are just some of the many examples.
  2. Follow a few shortcuts when it comes to getting back to eating healthy. No time? No problem. Sometimes the whole planning all your meals for the week, grocery shopping for all the food items, and THEN having to meal prep it all can be a little daunting, especially when you also have a large stack of laundry to do. When you’re short on time, it’s best to get by with a little help from our friends. You know what I’m saying? Here are some examples.
    1. Use pre-baked rotisserie chicken to shred and apply to salads, sandwiches, or use with dinners throughout the week instead of having to make your own.
    2. Utilize pre-cut fruit and vegetables from the grocery store. They may be a little more expensive, but for the week you’re trying to ease yourself back into a schedule, this will save you a ton of time and headache.
    3. Lean on healthy, pre-packaged meals to limp you along 😉 Examples include Nourish bowls, Daily Harvest smoothies, salad kits, salmon or tuna salad pouches, Greek yogurt kits, Blue Apron meals, etc.
  3. Listen to and trust your body. Avoid being too hard on yourself. Allow yourself some grace when it comes to getting back on a schedule after being on a vacation. It’s easy to let those anxious thoughts to invade your mind, but it’s not always easy to stop and remind yourself that a little relaxation was what your body and mind needed. Remember health is not just physical, but also mental. The beauty of following a healthy lifestyle is there will be times, days, or weeks where you get off track but ebbs and flows are what make it a lifestyle, not a diet. Therefore, you shouldn’t ever feel down on yourself for eating the pizza or taking the vacation. yoga.jpg

I hope you find this helpful! Feel free to comment with strategies that have worked well for you when transitioning from vacation mode back into everyday life.

-EAB

Posted on Leave a comment

Mini Tour Guide-Key West

Key West…what a fun city! It definitely has a distinct, almost-Bohemian feel to it. The little sister to New Orleans comes to mind when I try and best describe it. Chickens and roosters roam the streets and restaurants as if they own the town. Fishermen clean mahi mahi next to their boats in the Galleon marina just five feet from restaurants blackening these same mahi mahi on the grill. Tourist cruises and motoring tiki bar boats fly in and out of the marina what feels like every hour. Scooters and bike riders dominate the streets while the main artery of the city, Duval street, booms with vendors and walking tourists. The locals alone are one of the coolest aspects of this city. They are to-the-point, rough around edges, serve it to you with a smile and backhand-type of crowd. Their dry sarcasm was right up my alley.

I boated to Key West with my husband and in-laws from Marco Island, Florida. We docked in Tavernier, Florida for a few days then were ready to explore what seems to be the heart of the Florida Keys, Key West. En route to Key West, my husband and I scoured the internet for some of the best places to eat and things to do while in Key West. As we wrote down a few key restaurants we thought sounded good, we quickly realized that most restaurants had great reviews and it was hard to come by a menu that didn’t sound delicious. We said “screw it”, let’s just explore and see what happens.

We docked in the Galleon marina and set off on our adventure. Not before our usual ranking of all the boats around us in the marina of course. Here are some of the best food and tour recommendations I can give from our short time here in Key West. We just skimmed the surface of Key West so keep in mind this is a small piece of the (Key Lime) pie (sorry couldn’t resist) when it comes to things to eat/do/see. I can’t wait to go back and do a deeper dive but for now, here’s a small taste of the great things we experienced in Key West.

Best Food:

  • Breakfast:
    • Blue Heaven. This restaurant by-far had the most interesting history. Restaurant tables are nooked back in a little courtyard under a huge almond tree that spans the blue sky as far as your sight can take you. The property where the tables sit was once home to long nights of gambling, cock fights, and boxing matches refereed by no other than Ernest Hemingway himself. The rich history is visceral in the outdoor seating section. Food recommendations: Veggie Benedict, Ham Benedict. Also, you won’t want to miss the incredible Key Lime Pie here. The meringue towers about six inches above the pie itself. If any of you have ever tried to make a meringue in your free time understand what a true artform that is. BIDX4492
  • Casual Lunch/Dinner:
    • Schooner Wharf Bar. Our first stop of the trip. This bar had all the feels of Key West and from what we heard from the locals, it truly DOES fit one of the best descriptions of old Key West. Complete outdoor restaurant and bar with so many umbrellas and canopies you feel a slight relief from the stifling August heat. Gravel floors, chickens and roosters roaming and eating food scraps wherever they can find them, live music, and really great food. I mean really good. Our food favorites: Snapper/Mahi-Mahi Sandwich Melt, Mayan quesadilla with shrimp, and the fish taco wrap. This food paired with the Lizarita margarita started our trip off perfectly, but I may be bias.IMG_6861 (2).JPG
    • Conch Republic Seafood Company. This place took me by surprise. Nothing special about it when you look at it. Typical Key West outdoor bar and restaurant with live music looking over the marina. But it really snuck up on us. Went in with little expectations and left wanting more. And don’t worry, we got more 😉 To top it off, the service here was always on point. Whether you sit at the bar or in the restaurant, staff was very attentive and rather fast for always being packed. Enjoying the live music with a Corona in hand and a misting fan to keep me cool, what’s not to love? Did I mention it sits next to the marina? The fishing boats dock about five feet from the restaurant and filet the fish you’re about to eat right on the dock. Our food favorites: oysters on the half, conch chowder, island salad with seared rare tuna, local fresh catch of the day sandwich, blackened jumbo scallops, stuffed shrimp, island salad with seared tuna.615F9C72-75CC-427A-8D26-80BE42EDB2FB
  • Surf & Turf:
    • A & B Lobster House. If you’ve had your fair share of seafood and craving a nice, juicy steak, this place is for you. It’s just an extra bonus that they also have great seafood. The environment is a little fancier than the other restaurants on the historic boardwalk, but you’ll see every walk of life here so don’t worry too much. But do everyone a favor, take a shower, and put on your nicest Key West attire for this white tablecloth, candle-lit dinner. Can’t go wrong here, especially if you fancy yourself a night cap. The old cigar lounge and bar adjacent to the dining room makes a mean martini and will give you all the historic feels. Food recommendations: New England clam chowder, butter-poached Florida lobster tail, 2lb main lobster bake, filet mignon, and ribeye.
  • Cocktail by the water:
    • Sunset Tiki Bar by the Galleon Resort. Off the beaten path of the main boardwalk. A great spot to feel the salty breeze in your hair while overlooking boats come and go. The mango daiquiri and piña coladas here come with a kick-in-the-pants topper that will really get your day going 😉Sunset tiki

Places/things to see:

  • By foot:
    • Duval street: The hustle and bustle of Duval street is reminiscent of Bourbon street in New Orleans, but less sloppy (unless of course, you are stumbling out of Sloppy Joe’s bar). This historic street is the main artery of the city with plenty of great restaurants, bars, shopping, and art galleries to be seen here. You can easily spend a full day wandering up and down this street while munching on macarons and slurping a Corona Light…well at least that’s what I did. To each their own.Duval street
    • Historic Harbor Walk: If you’re sober enough to wander beyond Duval street, this is where you’ll want to go. This historic boardwalk lines multiple marinas and some of the best seafood and live music in the city (some of the places are mentioned above-A&B Lobster House, Conch Republic, Sunset Tiki Bar, Schooner Wharf Bar, etc.). From here, you can also take several different tours (sunset cruises, snorkeling adventures, fishing charters, Dry Tortugas day tours, etc.). Wandering along this harbor walk, you’re also likely to see fisherman fileting their fresh catch of the day, massive tarpon circling in the water for their 4pm tourist feeding, and if you’re lucky like I am, a shark 😉
  • By scooter or bike:
    • Ernest Hemingway House and Museam: This historic landmark was home to the famous author and manwhore (if I do say so myself; no insults, just factual), Ernest Hemingway. This beautiful home hosts several daily tours and private events, while also housing more than 40 cats with six toes. These cats are protected, treated like royalty and roam the grounds as such. I would too…this house is stunning and jam-packed with interesting history that speaks volumes of Ernest Hemingway and Key West as a whole. IMG_6884 (2)

      IMG_6891
      Polydactyl cat (six toes)
    • Key West Lighthouse Museum: You might want to make sure you hold off on the drinking before going here. The 1000+ winding steps (just kidding, it was only 88 steps but my god, it felt like a 1000) to get to the top of the lighthouse might make you feel a little woozy, but it’s definitely worth the view. From the top, the lighthouse points out historic landmarks so you know what you’re looking at. Another really great thing for those who haven’t done their research (cough, cough: me). Bonus: the keeper’s quarters offers a great air-conditioned reprieve from the scorching August heat. Oh yes! Back to the history. In all seriousness, the actual historical lights that were once used in the lighthouses, in addition to the countless other nautical artifacts make this spot worth the trip.
    • Key West Garden Club: Need a serene getaway from those that you’re traveling with? I’ve got your back. This old army fort is chalk full of beautiful blossoming flowers, trees, butterflies, and shrubs. This tranquil spot has some of the best views in Key West. It yields that looking-out-of-a-treehouse-onto-the-ocean-type-feel, similar to how I think I would have felt if I lived with the Swiss Family Robinsons. In different corners of this vegetated respite are great lookouts onto Higgs Beach (and pier) and Edward B. Knight Pier. Bonus: this is a free tourist location (however donations are welcome).
    • Southernmost point: This popular tourist attraction is exactly what it sounds like. It is quite literally the most southern point of the continental U.S. A large buoy now anchored to the ground stands at its point and is home to many tourist pictures. Many people stand in a long line to get a picture while touching the buoy. That wasn’t really our kind of thing so we opted for a bike ride drive-by.
    • The outskirts of the island: One of my favorite things we did was rent a scooter and drive around the outskirts of town. Here you get a real lay of the land and in my case, a true understanding of which way is Cuba and which way is mainland Florida. It’s difficult for some of us. A little wind in the air on a hot day doesn’t feel half bad either, but be careful not to leave a black-seated scooter parked out in the sun for too long. I learned the hard way and burned my ass.

      Scooters
      Just kidding. Ours looked like the red one 😉

      MPWT3668

    • Key West cemetery: Everyone loves an above-ground cemetery. You don’t get to see these just anywhere, at least not in Michigan. It’s an easy scooter drive-by or feel free to take your time and explore. Just don’t stay after nightfall.
  • By boat: On our last day in Key West, we took a tender boat ride around the majority of the island. This is one of the best ways to explore the waters around the island.
    • Naval Air Station, U.S. Army grounds, Coast Guard boats: If you spend more than 10 minutes in Key West, you quickly realize the heavy U.S. Army and Navy presence here. Helicopters and jets fly over frequently. But there’s a different feel to this when you’re on a boat vs. land…peering above into the blue sky to try and catch these little jets all in formation. Truly American comes to mind. IMG_6968
    • Liveaboards and derelict boats: This doesn’t too terribly interesting but imagine the shows tiny houses and hoarders combining…that’s how interesting some liveaboard boats can be. You can spend all day circling these boats trying to figure out how the hell they fit that much stuff onto a boat or what went wrong, in the case of derelict boats left halfway in a tree or half sunk. So many secrets kept by the sea. delinquent boat
    • The wildlife! Sharks, sea turtles, jellyfish, dolphins, pelicans, herons…best seen on a boat. Trust me! STHX2988

That’s all I have for now! If you’ve traveled to Key West, be sure to comment below with your favorite tourist and foodie spots…I would love to hear them!

-EAB

Posted on Leave a comment

Homemade Dill Pickles

Who doesn’t love a crisp, vinegar-infused pickle that’s been marinating in the fridge for a few weeks? In the summer months especially, I find myself craving pickles between meals or as a late-night snack. Not to mention, they make the best side to homemade burgers or additions to cold sandwiches. And believe me when I say, they are so easy to make at home! I’ve been away on vacation for the past couple weeks and there’s nothing better than coming home to a few jars of pickles that have been soaking up all that dill and vinegar for the last few weeks.

I started making these pickles a couple years ago and since then, it’s been hard to go back to store-bought pickles. But naturally there are times when our lives get too busy and we just don’t have the time. The beauty of investing in some of the supplies early-on is most of the equipment lasts for quite a while (i.e. mason jars, fine sea salt, etc.). And depending on how much of the produce you have growing in a garden vs. buy from the store will make a (small) monetary difference. If you’re an online shopper, I linked as much as possible in my list below to make your first pickling process smoother.

Dill pickles 1

Supplies needed:

Food needed:

  • Dill seed
  • Fresh dill (I used from my garden, but is generally $2-3 at the store)
  • Heirloom pickle cucumbers/Kirby or salad cucumbers work well too (again here, I used cucumbers from my garden, but I have also used store-bought cucumbers and they work great as well; about $0.50 per cucumber)
  • 100% fine sea salt
  • White vinegar
  • Garlic cloves (Depending on your local grocery store, about $0.69 each)
  • Red pepper flakes (optional)

I anticipate many of you have a saucepan, metal whisk, cutting board, knife, and might be able to rig up a few old pickle jars to cut down on initial cost. The nice thing is the majority of the supplies will be used several times over so you’ll definitely get your money’s worth.

I started off by cleaning the mason jars. If you’re short on time like I was last time, I just stuck those babies in the dishwasher on quick cycle. Otherwise, washing the mason jars on hot, soapy water will do the trick. Now is when you’ll also want to wash your fresh dill and cucumbers.

Once the cucumbers are dry, slice off the ends and cut into wedges. You can also do pickle coins or halved-lengthwise…your choice!

Dill pickles 2

Next, add your fresh dill, dill seed, garlic, and red pepper flakes (optional). You’ll want to use at least one sprig of fresh dill in each mason jar. I love fresh dill so for me, the more the merrier. But if you want to play it safe, stick with 1-2 sprigs of fresh dill per mason jar.

Pickles-4

Pickles-1

Now that the mason jars are prepped and ready to go, start adding your wedged cucumbers into each mason jar until full. Depending on how many cucumbers you have, you can really pack them in or just fill the mason jars evenly.

Pickles3

Pickles-5

Once your done filling the jars with the cucumbers, it’s time to boil the water, vinegar, and salt in the saucepan. Once the salt is dissolved (about 4-5 minutes), set aside and let cool for about 15 minutes. Using the funnel, pour the vinegar-water mixture into each mason jar evenly leaving about an inch from the top. Tighten the top on each of the jars and place in the refrigerator for about 1 week before consuming. They should last about 2 months in the refrigerator. Keep in mind, these are not canned pickles so they should not be stored at room temperature for any extended period of time.

The beauty of learning this quick pickling method is you can apply it to most other fresh vegetables that you would like pickle. For example, radishes, carrots, green beans, and asparagus also pickle nicely. You can also try different spices, herbs, or vinegars with any of these vegetables.

Enjoy!

Dill pickles 5

Dill Pickles

Prep Time 1 hour
Servings 4 mason jars

Ingredients

  • 6-7 salad or kirby cucumbers
  • 6-8 sprigs fresh dill
  • 2 tbsp dill seed
  • 2 tbsp 100% fine sea salt
  • 2 cups white vinegar
  • 2 cups water
  • 4 garlic cloves
  • red pepper flakes (optional)

Instructions

  1. Wash mason jars with hot soapy water, dry, and set aside (you can also boil the jars in hot water for 10 minutes as well). If you’re short on time, I just ran mine through the dishwasher on quick wash.

  2. Wash the cucumbers and fresh dill and pat dry.

  3. Once dry, cut off the ends of each cucumber and cut into wedges.

  4. Add one peeled garlic clove, 1/2 teaspoon of dill weed, 1-3 dill sprigs, and a pinch of red pepper flakes (optional) to each mason jar.

  5. Fill each mason jar with the cucumber wedges.

  6. Combine salt, vinegar, and water in a medium saucepan and bring to a boil. Boil until salt dissolves (~4-5 minutes).

  7. Once the salt has dissolved into the vinegar and water, remove the saucepan from the heat, and pour the vinegar mixture equally into each mason jar, leaving 1/2-1 inch from the top of the jar. Let it sit and cool for at least 10-15 minutes.

  8. Seal each jar with the lid and lightly tap on the top of the lid to help remove bubbles.

  9. Refrigerate and allow at least 1 week for pickling before trying (longer if desired flavor-wise).